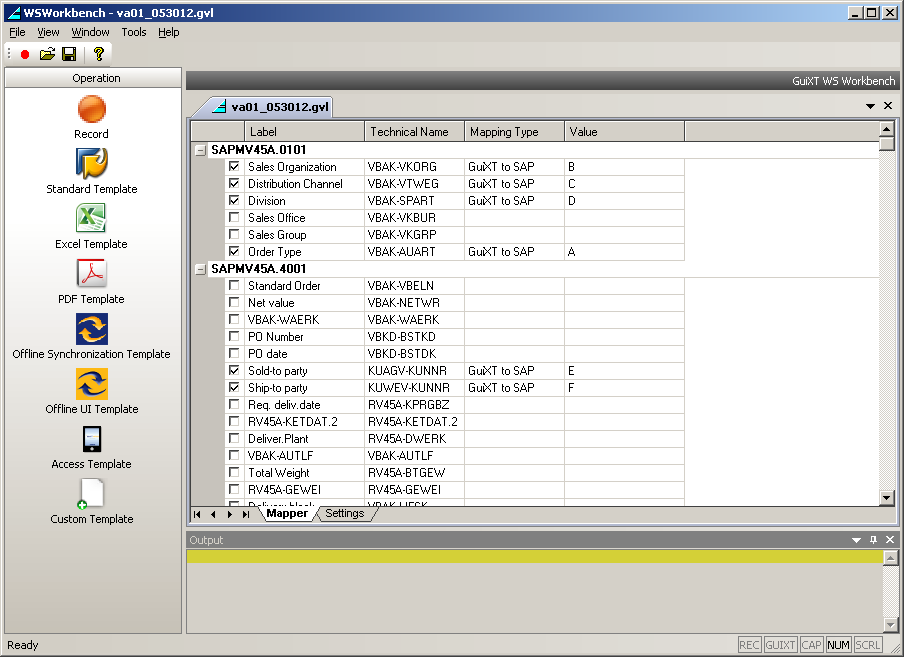
When using Workbench to generate a script to do data migration between a GuiXT-generated script and SAP, it is necessary to map the SAP fields to the GuiXT-created fields. In the case of Standard, Access and PDF templates, this is a one-to-one relationship - the fields are mapped to each other. in the case of Excel, the fields are mapped to the Excel columns, but this operation takes place within the Excel template. Workbench performs the mapping operation automatically whenever a user stops the recording process for a transaction.
Manual Field Mapping
Although Workbench usually will perform the mapping operation automatically, you can also map the fields manually before generating a script. There are four possible settings for the field mappings, as follows:
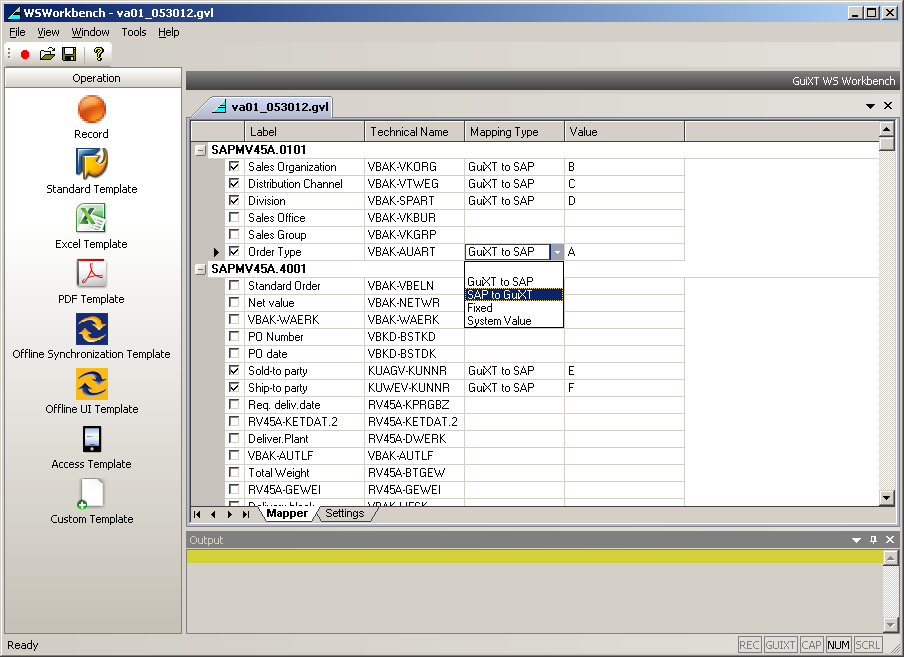
- GuiXT to SAP
-
This is the default setting. If you choose this option, data will be carried from GuiXT fields to SAP tables.
- SAP to GuiXT
-
Data will be carried from SAP to SAP fields.
- Fixed
-
Workbench will display the actual value you enter into the SAP field.
- System Value
-
This is not currently used in Workbench.
To manually map fields in the Workbench, please do the following.
-
Verify that you are in the Workbench's Mapper tab, as shown below.
-
Click on one of the cells to be mapped. An arrow will appear on the right end. Click on the arrow and a dropdown list will appear, as shown below. This dropdown list contains the four mapping options described above.

-
If the mapping type is correct, leave it as it is. If you need to change it, select the appropriate option from the dropdown list for the script you will generate. In this example, we will change it to 'SAP to GuiXT' as shown below.
-
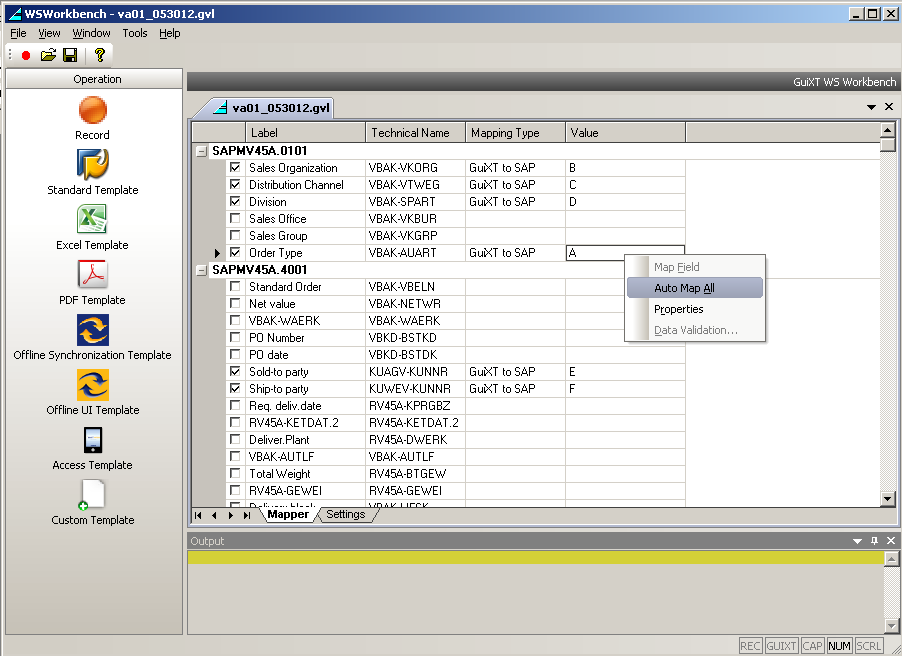
Repeat the mapping operation for all fields that you need to map. When you have set the mapping types for all necessary fields, right-click on one of the cells in the 'Technical Name' column and select 'Automap All' as shown below from the resulting dropdown list.
Note: You must map the fields prior to generating a script for Offline and Excel.
-
The automap operation will occur. This is invisible to the user. When all fields have been mapped, click the Settings tab at the bottom of the screen to view additional options.
-
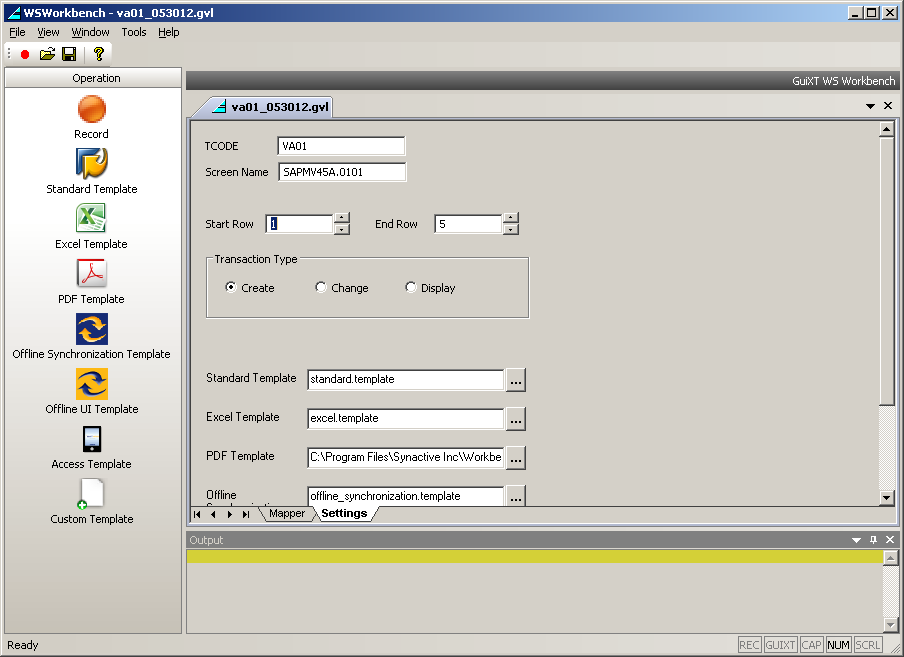
In the Settings tab, set the start and end rows if necessary. The start and end rows are explained more fully in the Configuration section of this document.
-
Once your settings are configured to your satisfaction, save the recording. You can save the recording by doing either of the following actions.
- Click the Save icon.
- Select the Save option from the File menu.
-
The recording file will be saved as a GVL file in the Workbench directory unless you specify a different directory by using the 'Save as...' command.