Prerequisites
- Products: Liquid UI WS, Liquid UI Server or Local DLL, Client Software
- Commands: pushbutton(), del(), onscreen(), table(), column(), enter()
Purpose
In this scenario, you will learn to remove the selection of a row on the table. We will walk you through the following steps.
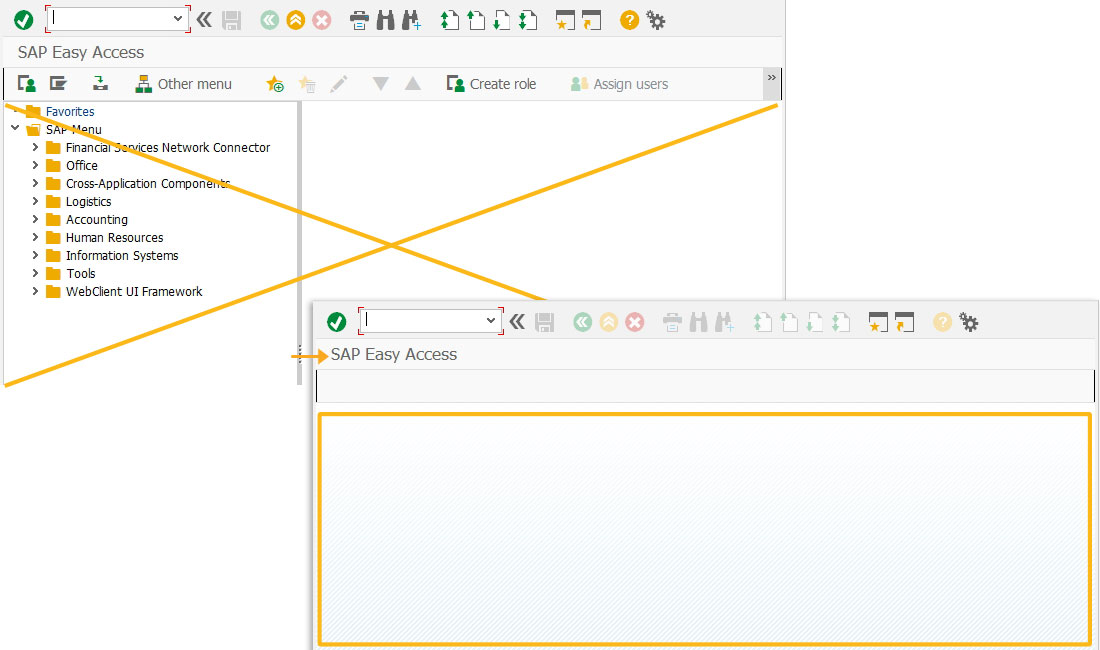
- Delete an image container on the SAP Easy Access screen using the del command
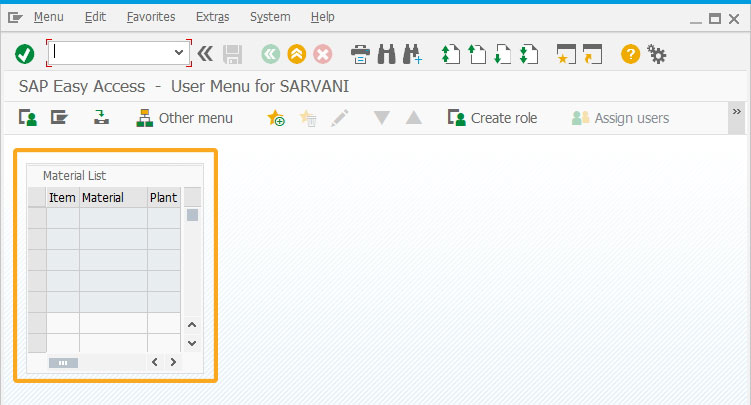
- Add a Liquid UI table
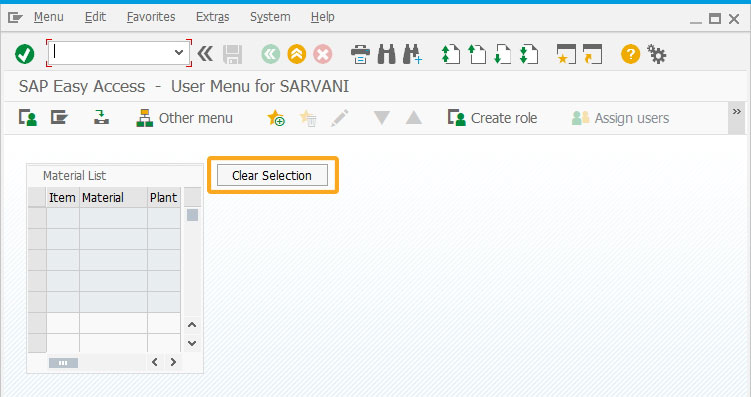
- Add a push button to execute a process on click
- Add functionality to the push button and clears the row selection
User Interface
//Create this file inside your script folder for customizing the SAP Easy Access screen: SAPLSMTR_NAVIGATION.E0100.sjs
//Now, let's start adding the Liquid UI script to the above file and save it.
Customization
- Logon to SAP and delete the image container on the SAP Easy Access screen using the del command.
//Deletes an image container
del("X[IMAGE_CONTAINER]");
- Add a Liquid UI table with three columns labeled Item, Material, and Plant on the SAP screen.
//Creates a table with Material List as title. The technical name is z_table, total number of rows is 100 and is defined as noneditable
table([1,3], [10,27], {"name":"z_table", "title":"Material List","rows":100, "singlerowselection":true,"readonly":true});
//Creates column with Item as title, at the first position, size as 4 and is readonly
column("Item", {"position":1,"table":"z_table","name":"z_itemcolumn", "size":4,"readonly":true});
//Creates a column with Material as title in the z_table, size as 9 and is noneditable
column("Material", {"position":2,"table":"z_table","name":"z_matcolumn", "size":9,"maxlength":18,"readonly":true});
//Creates a column with Plant as title in the z_table, size as 4 and is noneditable
column("Plant", {"position":3,"table":"z_table","name":"z_plantcolumn", "size":4,"readonly":true});
- Add a pushbutton with the label Clear Selection on the screen.
//Creates a pushbutton at row 1 and column 30 with Clear Selection as title, and on click executes deSelect process
pushbutton( [1,30], "Clear Selection",{"process":deSelect});
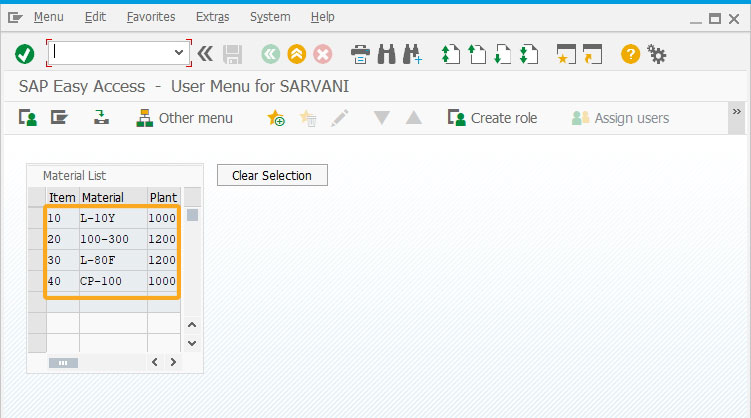
- Add a function deSelect to declare the three arrays with their respective values, and assign these values to the columns of a Liquid UI table.
//Declares array values
item_array = ['10','20','30','40'];
material_array = ['L-10Y','100-300','L-80F','CP-100'];
plant_array = ['1000','1200','1200','1000'];

//Assigns array values into the table columns
for(j=0;j<material_array.length;j++){
   z_table.z_itemcolumn[j] = item_array[j];
   z_table.z_matcolumn[j] = material_array[j];
   z_table.z_plantcolumn[j] = plant_array[j];
}// Function to clear the row selection
function deSelect(){
onscreen '*'
for(j=0; j<item_array.length; j++){   // Deselect line items
z_table.selectedrows[j] = " ";
}
enter('?');
}
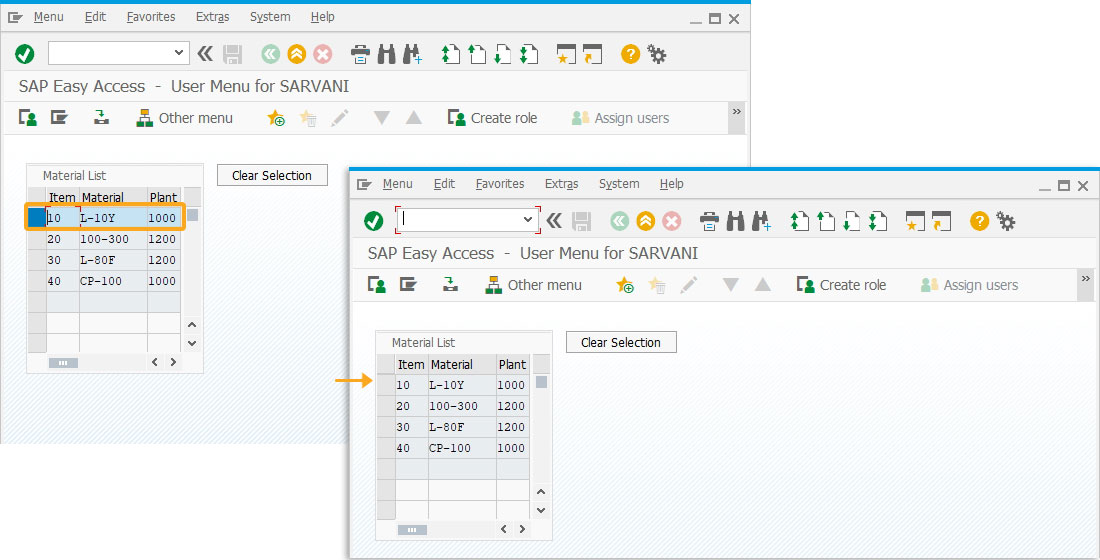
SAP Process
- Refresh the SAP Easy Access screen and select any row on the table. After selection, the row will appear in blue. Now, click the Clear Selection push button that executes the deSelect function and removes the selected table row values.
Next Steps

This article is part of the 4.0 Take a deep dive into the SAP table and Liquid UI table