Prerequisites
- Products: Liquid UI WS, Liquid UI Server or Local DLL, Client Software
- Commands: del(), pushbutton(), gettableattribute(), enter(), set(), table(), title(), text(), inputfield()
Purpose
In this scenario, you will learn to customize the SAP screen and add functionality to retrieve the selected row data on the Liquid UI table. Here, we have considered the Change Sales Order (VA02) screen to customize and display the column data of the selected rows inside the pop-up window using the Liquid UI WS script.
We will walk you through the following steps.
- To customize the Change Sales Order Overview screen
- Add a pushbutton to call a function DisplayRowData on click
- Add the function DisplayRowData to display the table row details
- To customize the pop-up window during the sales order process
- Delete the image container from the SAP screen using the del command
- Change popup title using the title command
- Delete the pushbuttons from the screen using the del command
- Add input fields to display the required number of column values as per the requirement
- Add a for loop to assign values into the fields
- Define an SAP process to display the required column values on the popup window
User Interface
//Create this file inside your script folder for adding functionality to customize the Change Sales Order Overview screen: SAPMV45A.E4001.sjs
//Now, let's start adding the Liquid UI script to the above file and save it.
Customization
Customization of Change Sales Order Overview screen
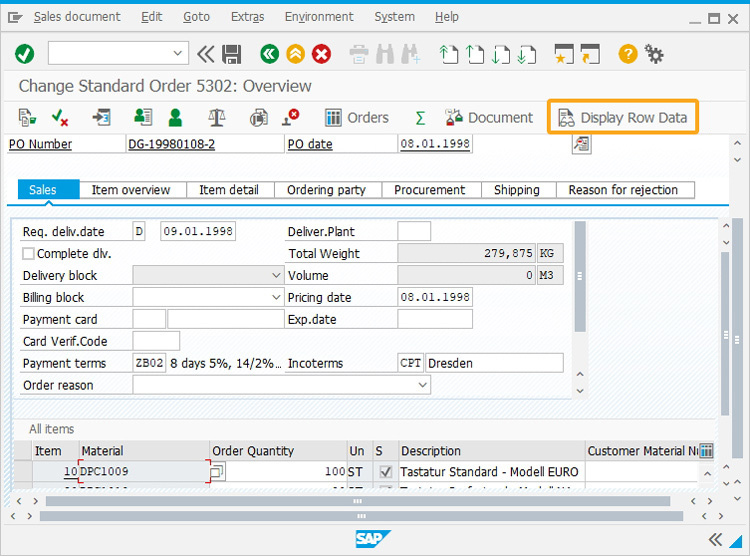
- Add a toolbar pushbutton with the label as Display Row Data on the Change Sales Order Overview screen to call the function DisplayRowData on click.
// Creates a pushbutton with the label as Display Row data to call a function “DisplayRowData” when clicked.
pushbutton([TOOLBAR], "@0P@Display Row Data..",{"process":DisplayRowData});
- Add the following DisplayRowData function to fetch the selected table row values and save them in the array.
// Creates a pushbutton with a label as Execute Pricing and enter /o in the transaction field to open a new session on click.
function DisplayRowData(){
   z_matarray=[];
   z_pricingdatearray=[];
   z_billingdatearray=[];
   z_itemarray=[];
   z_accassigngrparray=[];
   z_quantity=[];
   enter("/o");
   gettableattribute("T[All items]", {"firstvisiblerow":"FVisRow", "lastvisiblerow":"LVisRow", "lastrow":"LastRow","selectedrows":"SelRows"});
   for(i=0;i<LastRow;i++){
   ROW_NUMBER = i;
      if(SelRows[ROW_NUMBER]=="X"){
         // adding 1 as SelRows is array which has index begin from 0
         selected_row_number = ROW_NUMBER+1;
         set("V[z_item]","&cell[All items,Item,"+(selected_row_number)+"]");
         z_itemarray.push(z_item);
         set("V[z_material]","&cell[All items,Material,"+(selected_row_number)+"]");
         z_matarray.push(z_material);
         set("V[z_pricingdate]","&cell[All items,Pricing date,"+(selected_row_number)+"]");
         z_pricingdatearray.push(z_pricingdate);
         set("V[z_billingdate]","&cell[All items,Billing Date,"+(selected_row_number)+"]");
         z_billingdatearray.push(z_billingdate);
         set("V[z_accassigngroup]","&cell[All items,VBAP-KTGRM,"+(selected_row_number)+"]");
         z_accassigngrparray.push(z_accassigngroup);
   	set("V[z_compquantity]","&cell[All items,Component quantity,"+(selected_row_number)+"]");
         z_quantity.push(z_compquantity);
      }
    }
 }
//Create another file inside your script folder for customizing the sessions related popup window displayed while changing the sales order: RSM04000_ALV_NEW_E2000.sjs
//Now, let's start adding the Liquid UI script to the above file and save it.
Customization of the popup window
- Initially, delete all the screen elements that appeared on the popup window using the clearscreen command, as shown below:
// This command deletes all the screen elements existing on the screen
clearscreen();
- Change the title of the popup window from Back-End Sessions to Displaying Selected Row Details.
// This command changes the title of the screen
title('Displaying Selected Row Details', {"size":[1,10]});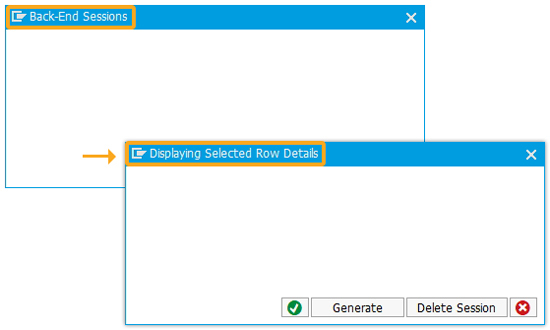
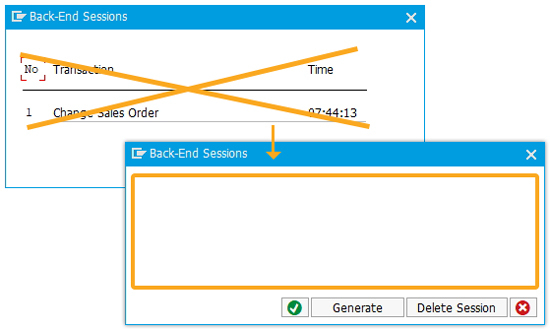
- Now, delete the pushbuttons Generate, End Session, Delete Session, and Continue existing on the popup window.
// Deletes pushbuttons existing on the popup window
del('P[Generate]');
del('P[End Session]');
del('P[Delete Session]');
del('P[Continue]');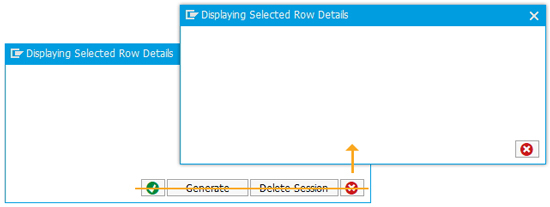
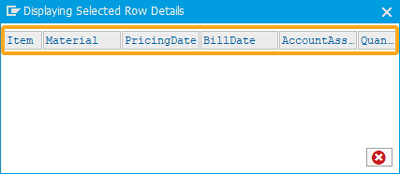
- Add the required number of input fields on the popup window to display the column values. In this scenario, we are adding six input fields with labels Item, Material, PricingDate, BillDate, AccountAssignGrp, and Quantity, as shown below.
// Adds six input fields with default values
inputfield([0,0],{"size":5, "intensified":true, "nolabel":true, "default":"Item", "readonly":true});
inputfield([0,6],{"size":11, "intensified":true, "nolabel":true, "default":"Material", "readonly":true});
inputfield([0,18],{"size":11, "intensified":true, "nolabel":true, "default":"PricingDate", "readonly":true});
inputfield([0,30],{"size":11, "intensified":true, "nolabel":true, "default":"BillDate", "readonly":true});
inputfield([0,42],{"size":11, "intensified":true, "nolabel":true, "default":"AccountAssignGrp", "readonly":true});
inputfield([0,54],{"size":5, "intensified":true, "nolabel":true, "default":"Quantity", "readonly":true});
- Now, add the following for loop statement to create the required number of input fields based on the number of columns displayed on the popup window.
// Creating the inputfields based on the rows selected
for(j=0;j<z_matarray.length;j++){
   inputfield([j+1,0],{"size":5,"name":"z_item_&V[j]","nolabel":true,"readonly":true});
   inputfield([j+1,6],{"size":11,"name":"z_matarray_&V[j]","nolabel":true,"readonly":true});
   inputfield([j+1,18],{"size":11,"name":"z_pricingdate_&V[j]","nolabel":true,"readonly":true});
   inputfield([j+1,30],{"size":11,"name":"z_billingdate_&V[j]","nolabel":true,"readonly":true});
   inputfield([j+1,42],{"size":11,"name":"z_accassigngrp_&V[j]","nolabel":true,"readonly":true});
   inputfield([j+1,54],{"size":5,"name":"z_quantity_&V[j]","nolabel":true,"readonly":true});
}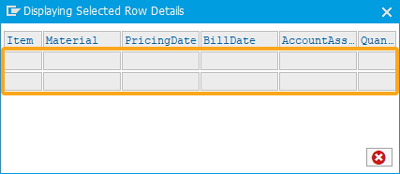
- Add another for loop statement to assign the array values into the input fields created on the popup window.
 //Displaying the array values in inputfields
for(j=0;j<z_matarray.length;j++){
   set("V[z_matarray_&V[j]]",z_matarray[j]);
   set("V[z_billingdate_&V[j]]",z_pricingdatearray[j]);
   set("V[z_pricingdate_&V[j]]",z_billingdatearray[j]);
   set("V[z_item_&V[j]]",z_itemarray[j]);
   set("V[z_accassigngrp_&V[j]]",z_accassigngrparray[j]);
   set("V[z_quantity_&V[j]]",z_quantity[j]);
}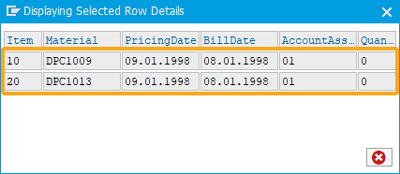

Note: Make sure to save the Liquid UI script file after updating and then refresh the SAP screen to see the changes.
SAP Process
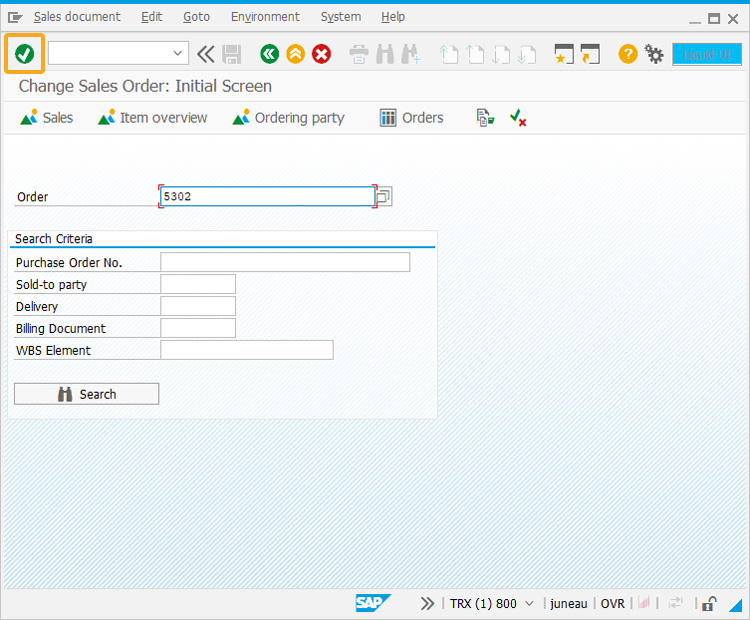
- Navigate to the Change Sales Order Initial screen, and enter the value for the Order input field, as shown in the image below; click enter.
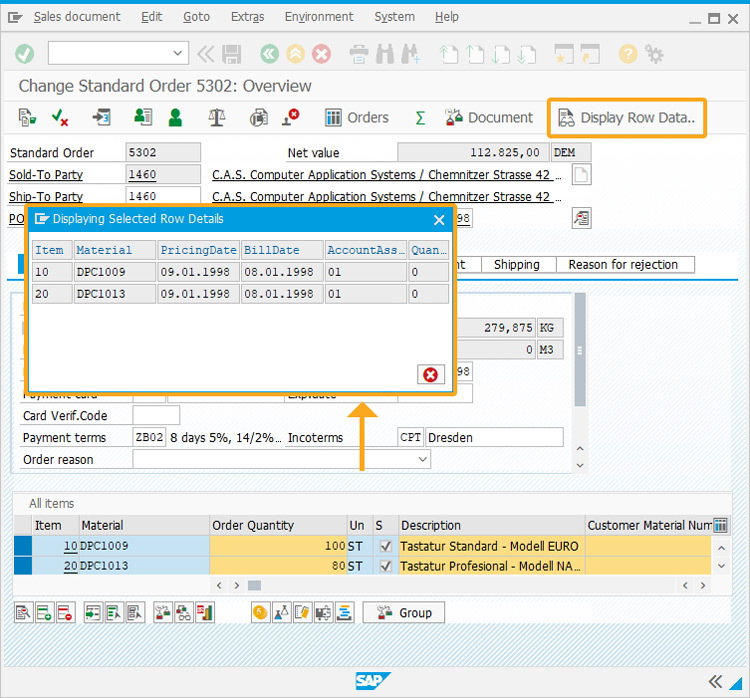
- You will be navigated to the Change Standard Order Overview screen. Scroll down to the All items table and select the rows, as shown below.
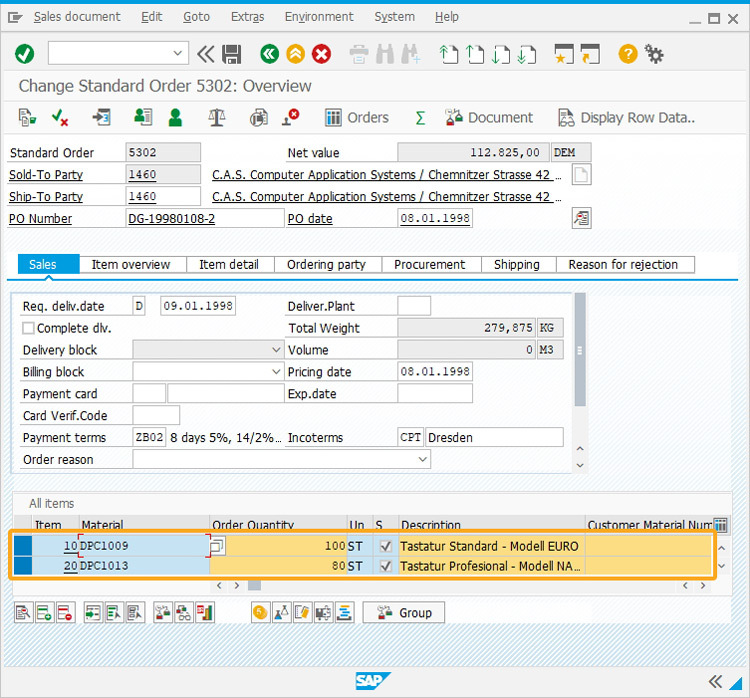
- Here, we have selected the first two rows of the table. Now, click the Display Row Data toolbar pushbutton, which calls the function DisplayRowData that displays the values of Item, Material, Pricing Date, Bill Date, and Quantity columns on the popup window, as shown below: