Prerequisites
- Products: Liquid UI WS, Liquid UI Server or Local DLL, Client Software
- Commands: radiobutton(), del(), set(), onUIEvents(), onscreen(), enter()
Purpose
Learn how to pass values to different screens using the radio button.
User Interface
Example 1: Assign values to fields on different screens using the radio button
//Create this file in your folder for customizing the Create Sales Order: Initial Screen. SAPMV45A.E0101.sjs
//Now, let’s add the Liquid UI script to the above file and save it.
In the following example, we will use a set of radio buttons to pass values from the VA01 Initial Screen to the VA01 Overview Screen.
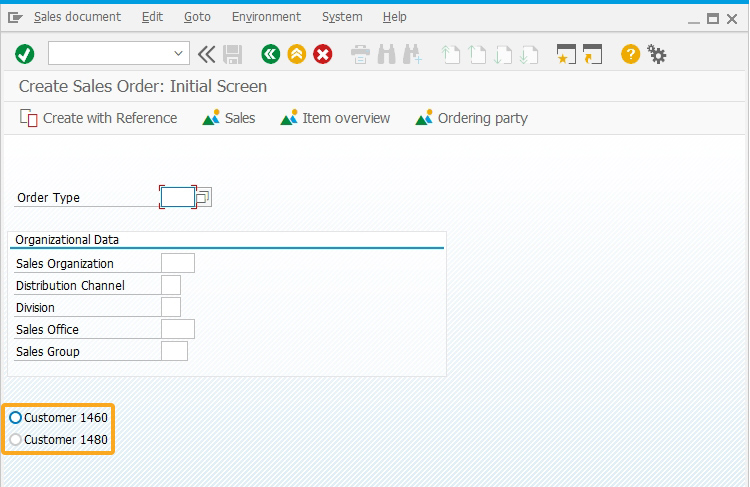
- Add two radio buttons with the labels Customer 1460 and Customer 1480 to set the specified values on selection.
//Sets radio button to pass values from VA01 screen
radiobutton([12,0], "Customer 1460",{"name":"z_cust", "value":"1460"});
radiobutton([13,0], "Customer 1480",{"name":"z_cust", "value":"1480"});
- Add the following script to the file and save it.
onUIEvents["enter"] = z_rad;
//Adds a function to set values to the input fields
function z_rad()
{
onscreen 'SAPMV45A.4001'
set("F[Sold-to party]", "&V[z_cust]");
set("F[Ship-to party]", "&V[z_cust]");
enter();
}
SAP Process
- Navigate to the VA01 transaction. Enter the value for the Order Type input field and select the Customer 1460 radio button, as shown below.
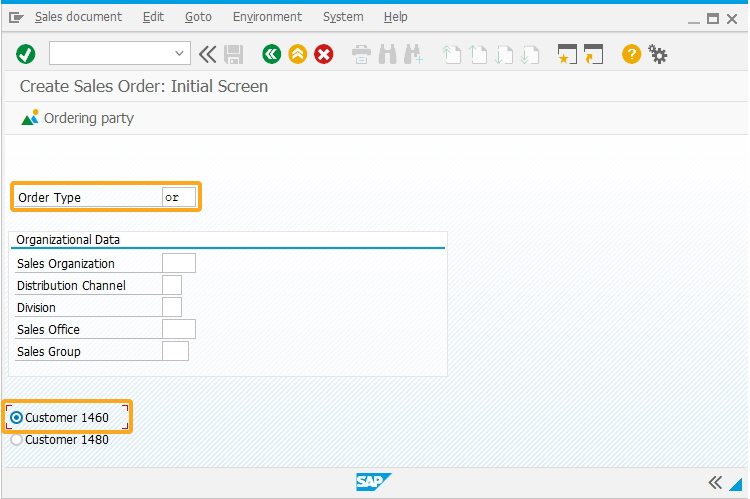
- Here, we are passing the value of the Customer 1460 radio button to the Sold-To Party and Ship-To Party fields that are associated with the VA01 Overview screen, as shown in the image below:

Example 2: Pre-Select the radio button on the different screen
//Create this file in your folder for customizing the SAP Easy Access screen. SAPLSMTR_NAVIGATION.E0100.sjs
//Now, let’s add the Liquid UI script to the above file and save it.
In the following example, we will use a set of radio buttons to pass values from the SAP Easy Access screen to the MB1C Overview Screen.
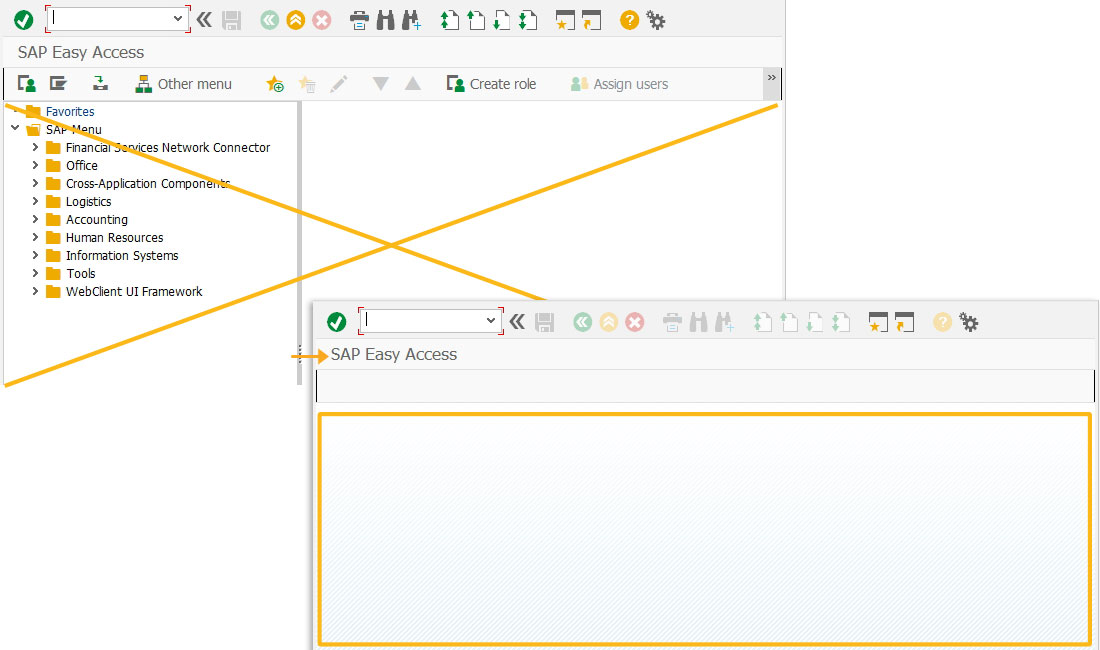
- Delete the image container using the del command.
//Delete ActiveX Container on the SAP Easy Access screen
del('X[IMAGE_CONTAINER]');
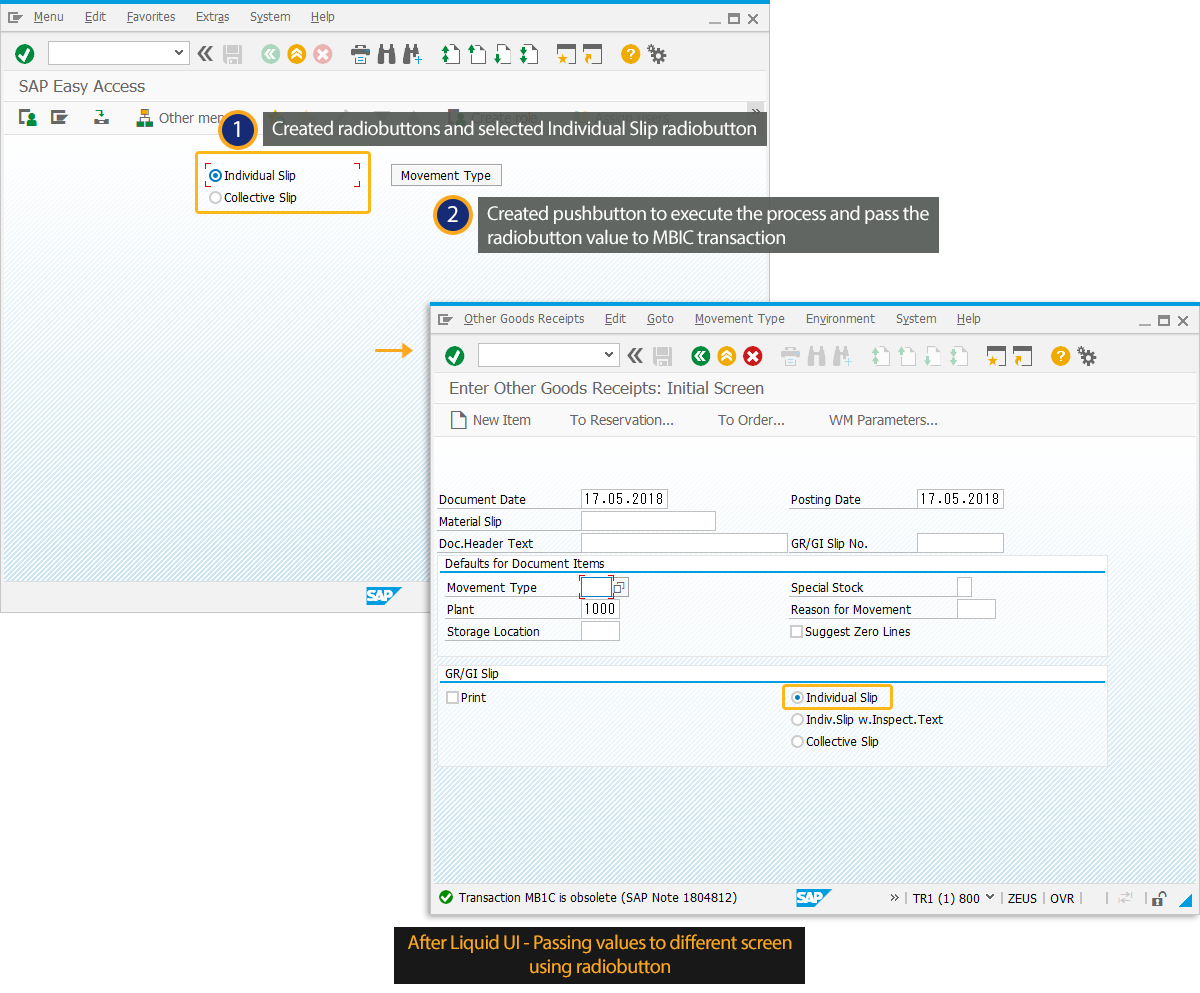
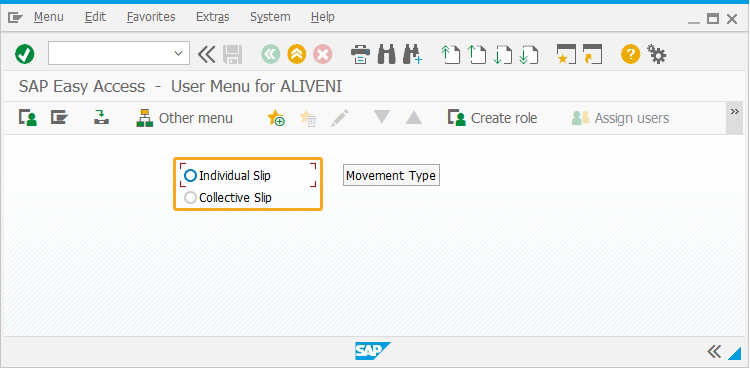
- Add push button Movement Type to execute the z_test process on click.
//Creates push button Movement Type
pushbutton([1,48], "Movement Type", "/nmb1c",{"process":z_test});

- Add radio buttons Individual Slip and Collective Slip to execute the process z_radio on selection.
//Creates two radio buttons
radiobutton([1,25], "Individual Slip",{"name":"z_radio","value":"A"});
radiobutton([2,25], "Collective Slip",{"name":"z_radio","value":"B"});
- Add the following script to the file and save it.
//Adds function to set the values to radio buttons.
//Function to set values
function z_test() {
onscreen 'SAPMM07M.0400'
if(z_radio=="A")
{
set("R[Individual Slip]","X");
}
if(z_radio=="B") {
set("R[Collective Slip]","X");
         }
}
SAP Process
- Logon to SAP, on the SAP Easy Access screen, select the required radio button and click the Movement type pushbutton.
- You can view the Individual Slip radio button pre-selected on the Goods Receipts screen(MB1C), as shown below.