Prerequisites
- Products: Liquid UI WS, Liquid UI Server or Local DLL, Client Software
- Commands: pushbutton(), box(), set(), del(), onscreen, enter(), return(), text(), onUIEvents()
Purpose
In this article, you will learn how to:
- Create invisible Liquid UI fields on the SAP Easy Access Screen.
- Display the description of the given input value on an SAP screen using Liquid UI WS
To showcase this feature, we’ll guide you through a scenario consisting of the following steps.
- Set the Directory Path in the guixt.sjs file to customize the SAP screen.
- Delete unnecessary elements on the SAP Easy Access screen using the del command.
- Create a box using the box command to display the hidden input fields and descriptions.
- Create five input fields to enter the values.
- Add text commands for input fields to display the description on the SAP screen.
- Add a function to read the text value of the fields.
- Add an onUIEvents command to trigger the function.
User Interface
//Create the file SAPLSMTR_NAVIGATION.E0100 inside your script folder for customizing the SAP Easy Access screen
//Now, let's add the Liquid UI script to the above file and save it.
Customization
- Open the guixt.sjs file and set the directory path, as shown in the following image.
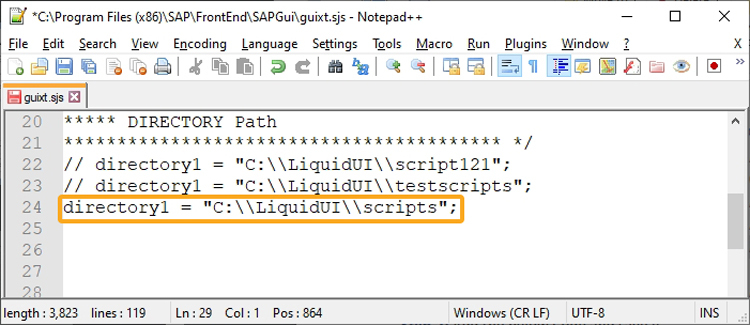

Note: The guixt.sjs file can be found in the following path.
C:\Program Files\SAP\FrontEnd\SAPgui --> 32-bit O.S
C:\ProgramFiles(x86)\SAP\FrontEnd\SAPgui --> 64-bit O.S
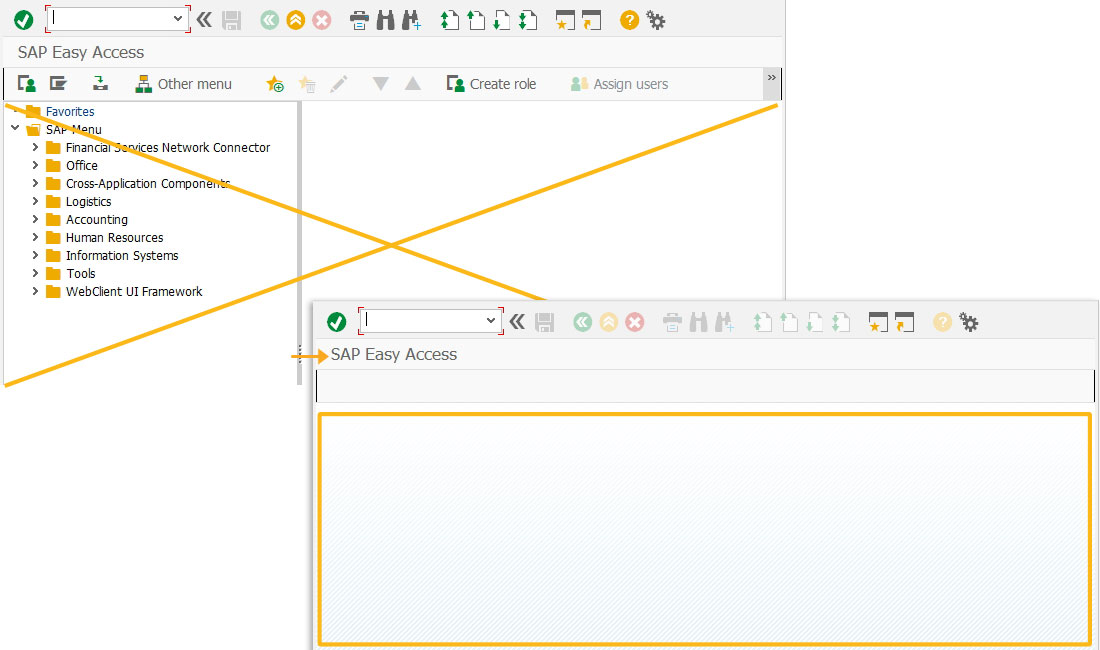
- Logon to SAP and delete the image container on the SAP Easy Access screen using the del command.
// Deletes an image container on the SAP Easy Access screen
del("X[IMAGE_CONTAINER]");
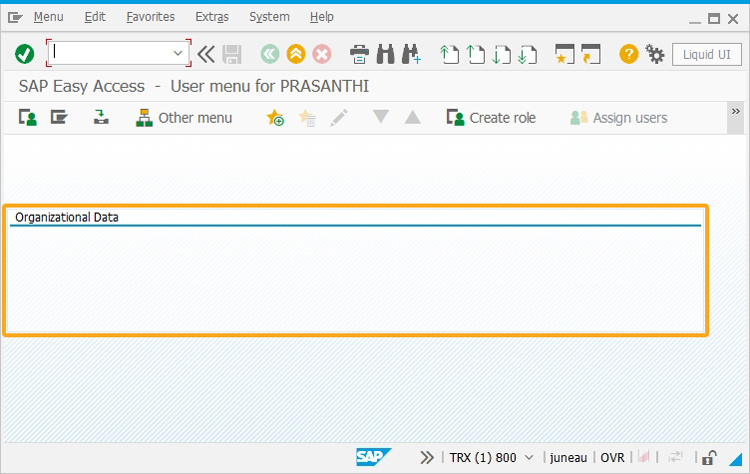
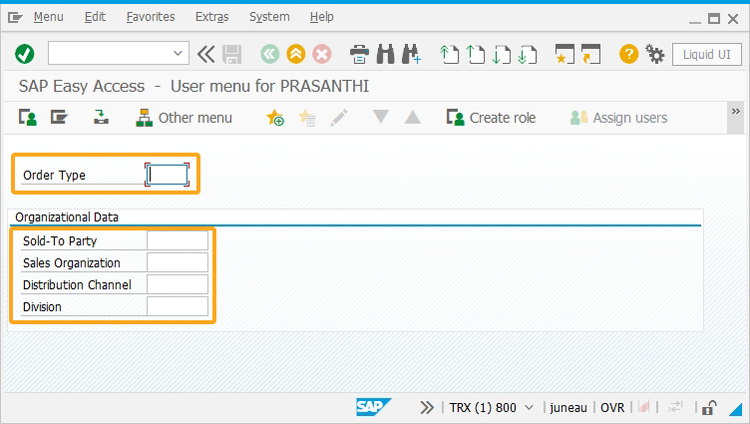
- Now, create a box using the box command with the label Organizational Data, where you can add the hidden input fields and their description fields, as shown in the image below.
// Creates a box with the label Organizational Data to create the input fields.
box([3,0],[8,98], "Organizational Data");
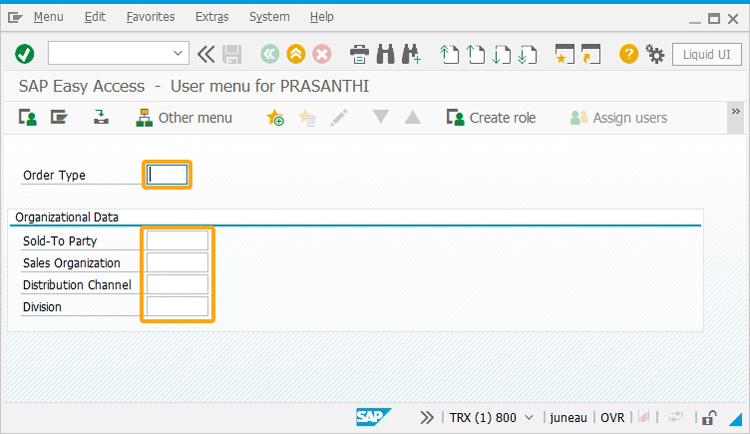
- Create five input fields with labels as Order Type, Sold-To Party, Sales Organization, Distribution Channel, and Division to enter the values, as shown below.
// Creates five input fields with labels as Order Type, Sold-To Party, Sales Organization, Distribution Channel, and Division to enter the input.
inputfield([1,2],"Order Type",[1,20],{"name": "z_ordertype","size":5});
inputfield([4,2],"Sold-To Party",[4,20],{"name": "z_soldtoparty","size":8});
inputfield([5,2],"Sales Organization",[5,20],{"name": "z_salesorganization","size":8});
inputfield([6,2],"Distribution Channel",[6,20],{"name": "z_distrchnl","size":8});
inputfield([7,2],"Division",[7,20],{"name": "z_div","size":8});
- Now, add a text command for each input field created to display their description on the SAP Easy Access screen, as shown below.
// Creates five text commands to display the description of the created input fields.
text([1,27],"&V[z_ordertype]",{"size":20});
text([4,30],"&V[z_soldtopartyvalue]",{"size":22});
text([5,30],"&V[z_salesorg]",{"size":20});
text([6,30],"&V[z_distributionchannel]",{"size":22});
text([7,30],"&V[z_division]",{"size":20});
- Now, add a function named getvalue to read the Text/Name value of the fields, as shown below.
// Function to read the Text/Name Value of the Fields.
function getvalue(){
 onscreen 'SAPLSMTR_NAVIGATION.0100'
 enter("/nva01");
 onscreen 'SAPMV45A.0101'
 set("F[Order Type]","&V[z_ordertype]");
 set("F[Sales Organization]","&V[z_salesorganization]");
 set("F[Distribution Channel]","&V[z_distrchnl]");
 set("F[Division]","&V[z_div]");
 enter();
 onerror
 enter("/n");message(_message);
 goto End;
 onscreen 'SAPMV45A.4001'
 set("F[Sold-To Party]","&V[z_soldtoparty]");
 enter();
 onscreen 'SAPMV45A.4001'
 enter("/2");
 set("F[Sold-To Party]);","&V[z_soldtoparty]");
 enter();
 onscreen 'SAPMV45A.4001'
 enter("/2");
 set("V[z_soldtopartyvalue]);","&F[KUAGV-TXTPA]");
 enter("/3");
 onscreen 'SAPMV45A.4001'
 enter("/3");
 onscreen 'SAPLSPO1.0100'
 enter("=NO"); onscreen 'SAPMV45A.0101'
 set("V[z_salesorg]);","&F[TSPAT-VTEXT]");
 set("V[z_distributionchannel]);","&F [TVTWT-VTEXT]");
 set("V[z_division]);","&F[TSPAT-VTEXT]");
 enter("/3");
 End:;
} - Now, call the getvalue function using the OnUIEvents command.
// Creates five text commands to display the description of the created input fields.
//Calling the Function through on User Event (onUIEvents):
onUIEvents["Enter"]={"process":getvalue};
Note: Here, the function getvalue is recorded using Liquid UI Designer.
SAP Process
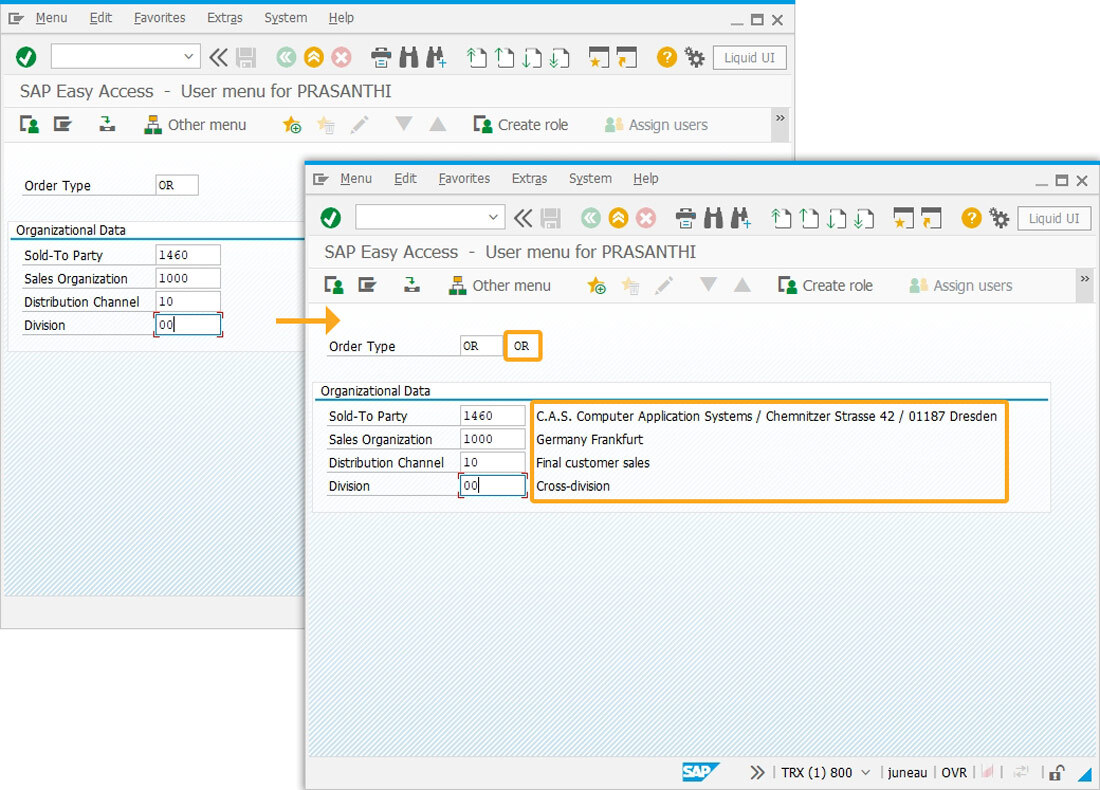
- Now, refresh the SAP Easy Access screen, and enter the values for the input fields created as follows.
- Order Type: OR
- Sold-To Party: 1460
- Sales Organization: 1000
- Distribution Channel: 10
- Division: 00
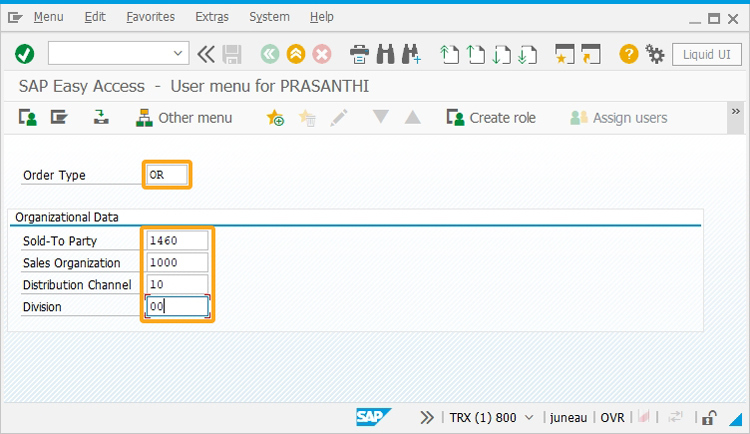
- Click enter to get the description of the values entered for the input fields on the SAP screen, as shown in the image below.