Purpose
LAMP now allows you to specify the start transaction and TLS status when creating an SAP connection. And, after synchronizing your Android license with LAMP, you will see the specified start transaction and TLS status in the profile list. This article details the process for setting the start transaction and TLS options in LAMP.

Note: Make sure to link the desired user and Android device to your User Group in LAMP before synchronizing your Android license.
To Link a User:
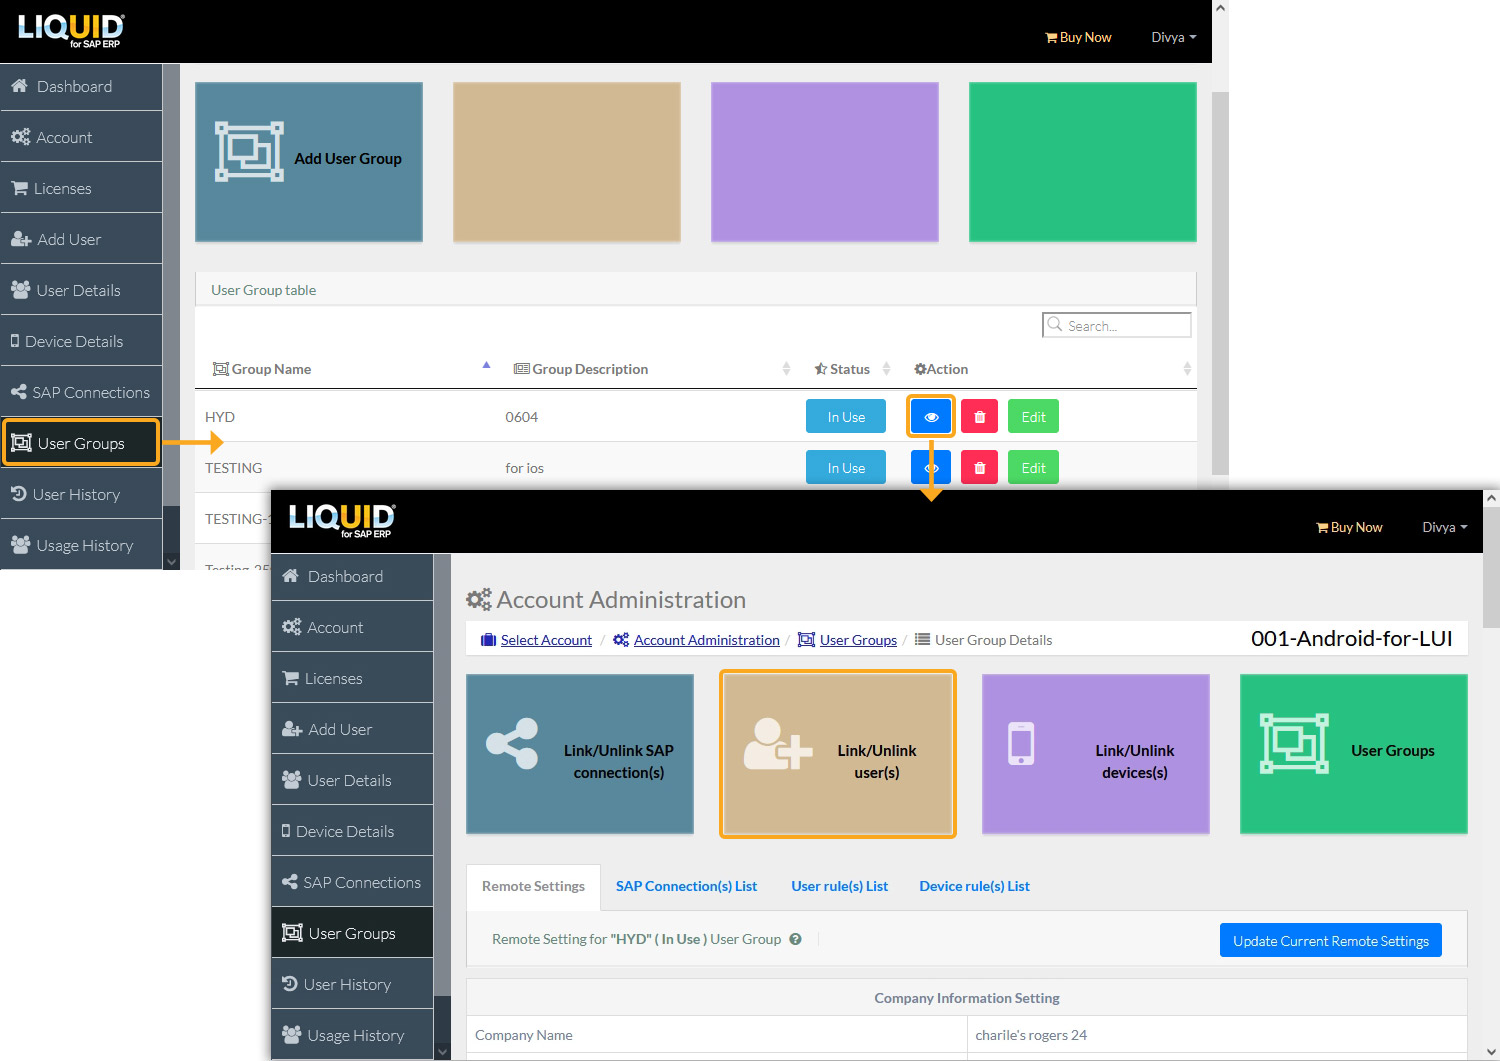
- Log in to LAMP and navigate to your Account Administration page. Under the sidebar, click on the User Groups tab. From the available options, select the desired user group. Locate and click on the Link/Unlink users option, as shown below.
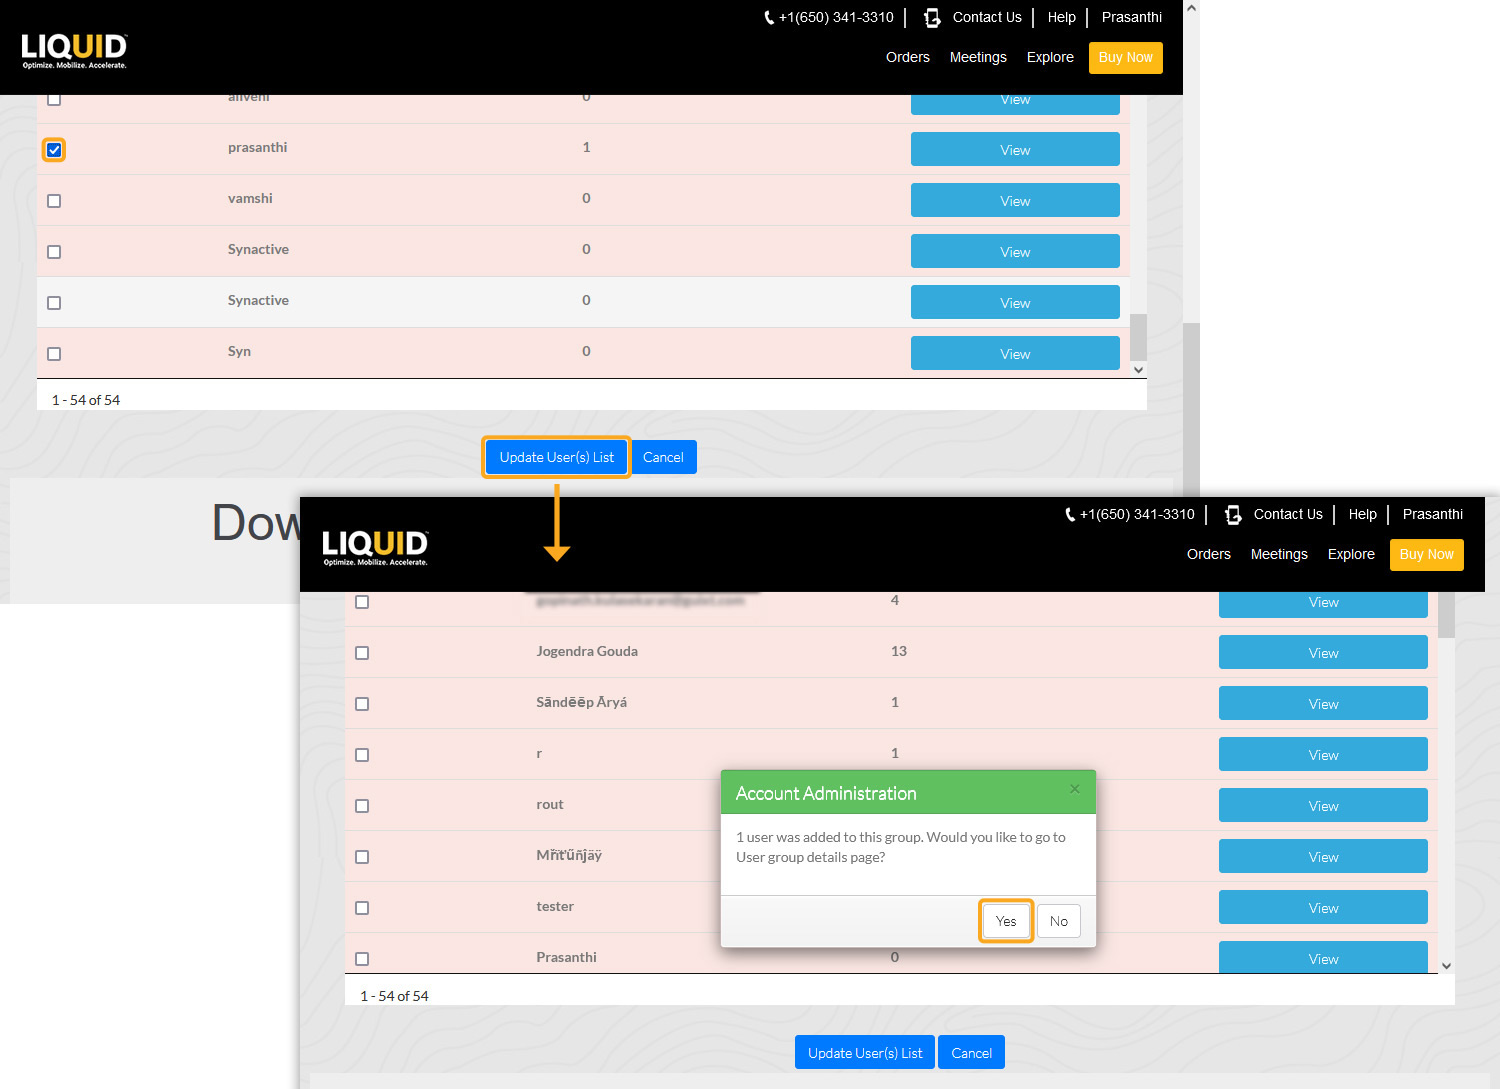
- From the list, select the user you want to link and click the blue Update User(s) List button. A pop-up window will appear to confirm the action. Click Yes to proceed.
To Link a Device:
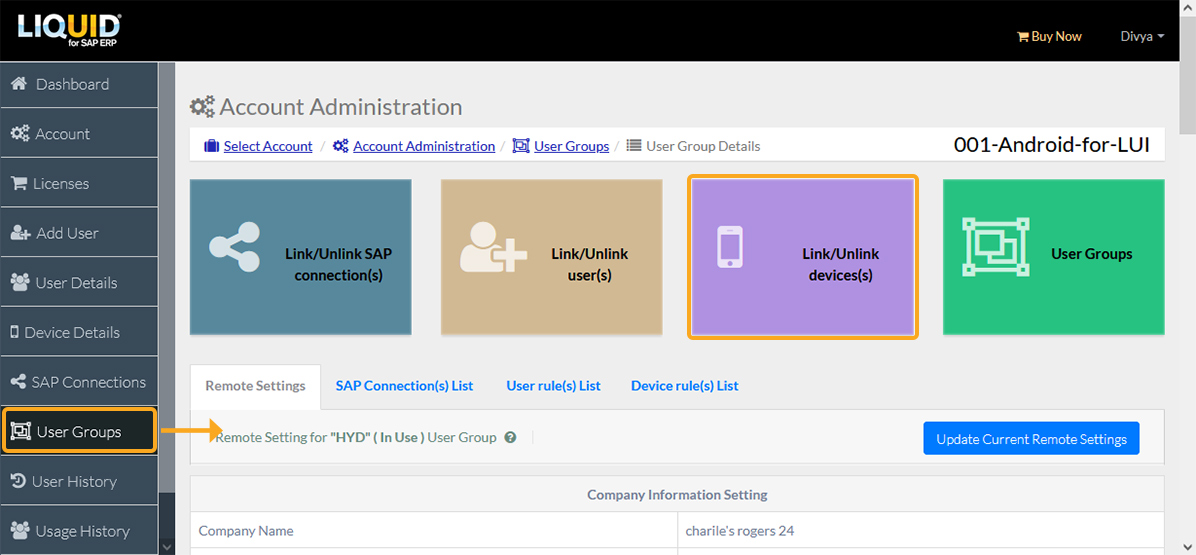
- On your Account Administration page, click Link/Unlink device(s).
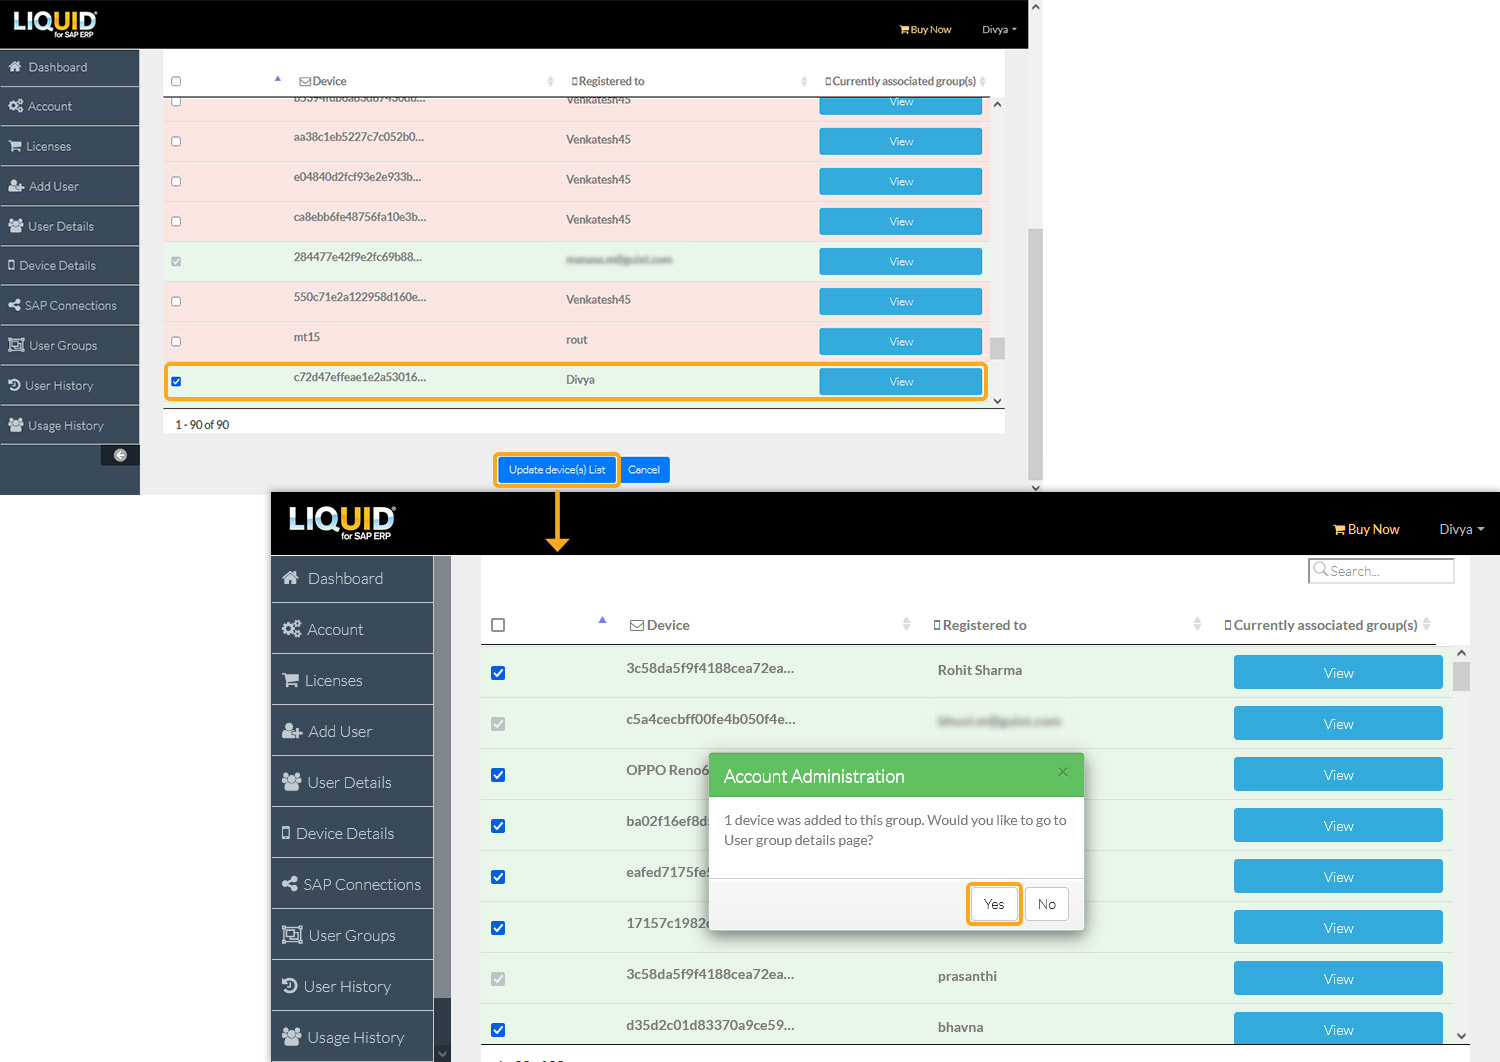
- From the list, select the device you want to link and click the blue Update device(s) List button. A pop-up window will appear to confirm the action. Click Yes to proceed.
Configuring Start and TLS Options
The below sequence demonstrates the configuration of Start and TLS options while creating an SAP Connection.
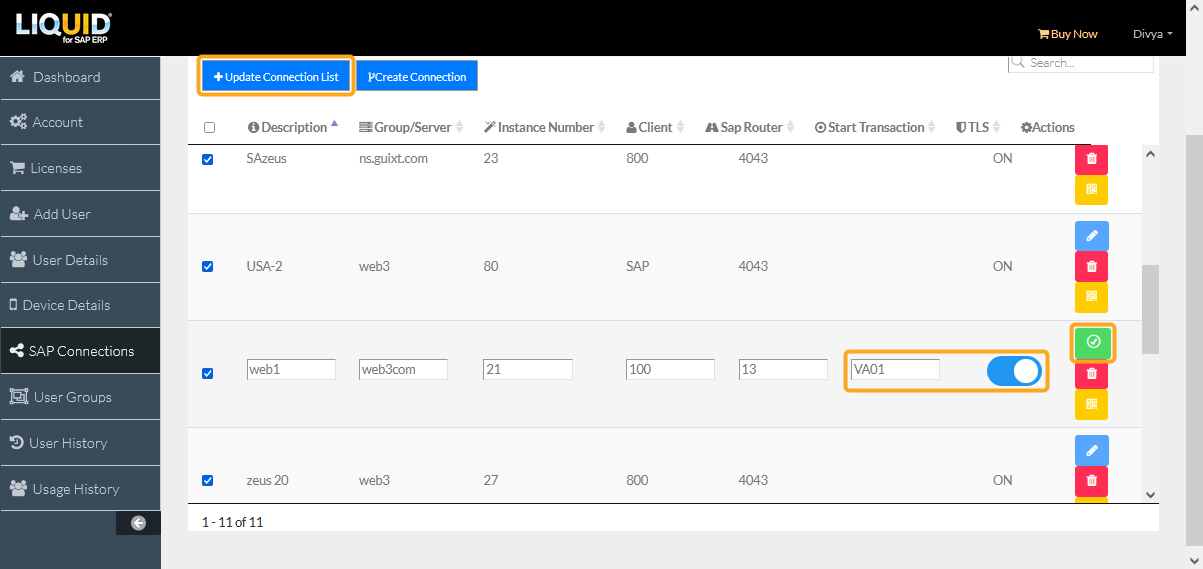
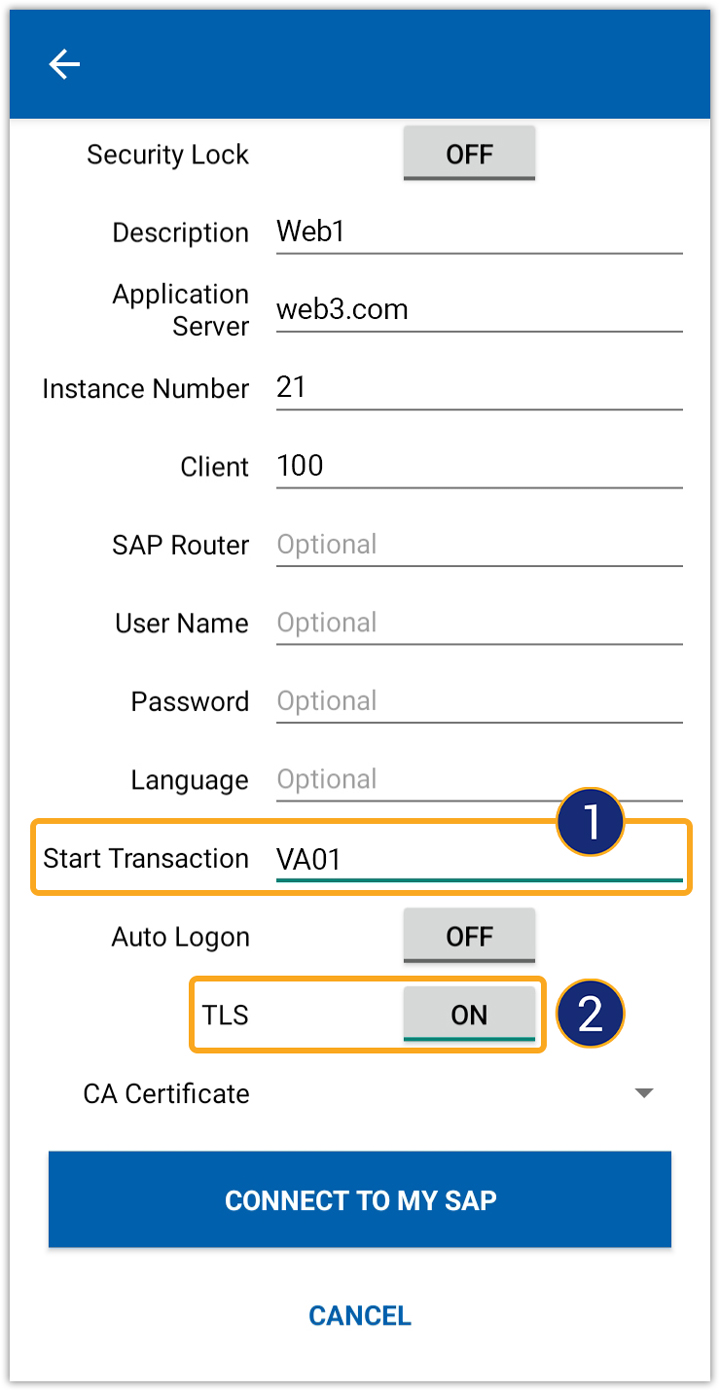
- On the sidebar, navigate to SAP Connections. Select Create Connection and provide the required details, including the Start Transaction (in this case, VA01) and the status of the TLS (enable/disable) option. Finally, click Add Connection.

- Once your connection has been created, click the Update Connection List button to add the new SAP connection to the desired account.
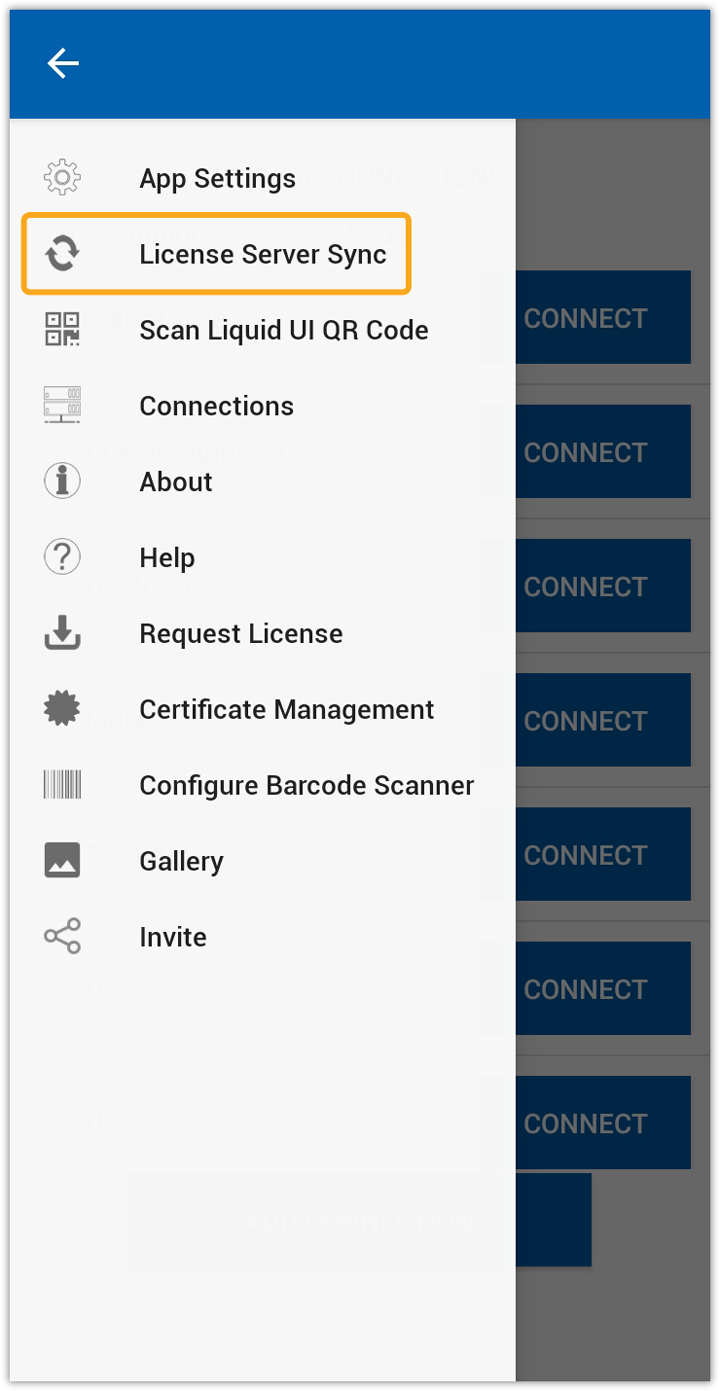
- To sync your Android license, click License Server Sync in Liquid UI for Android, as shown in the image below.
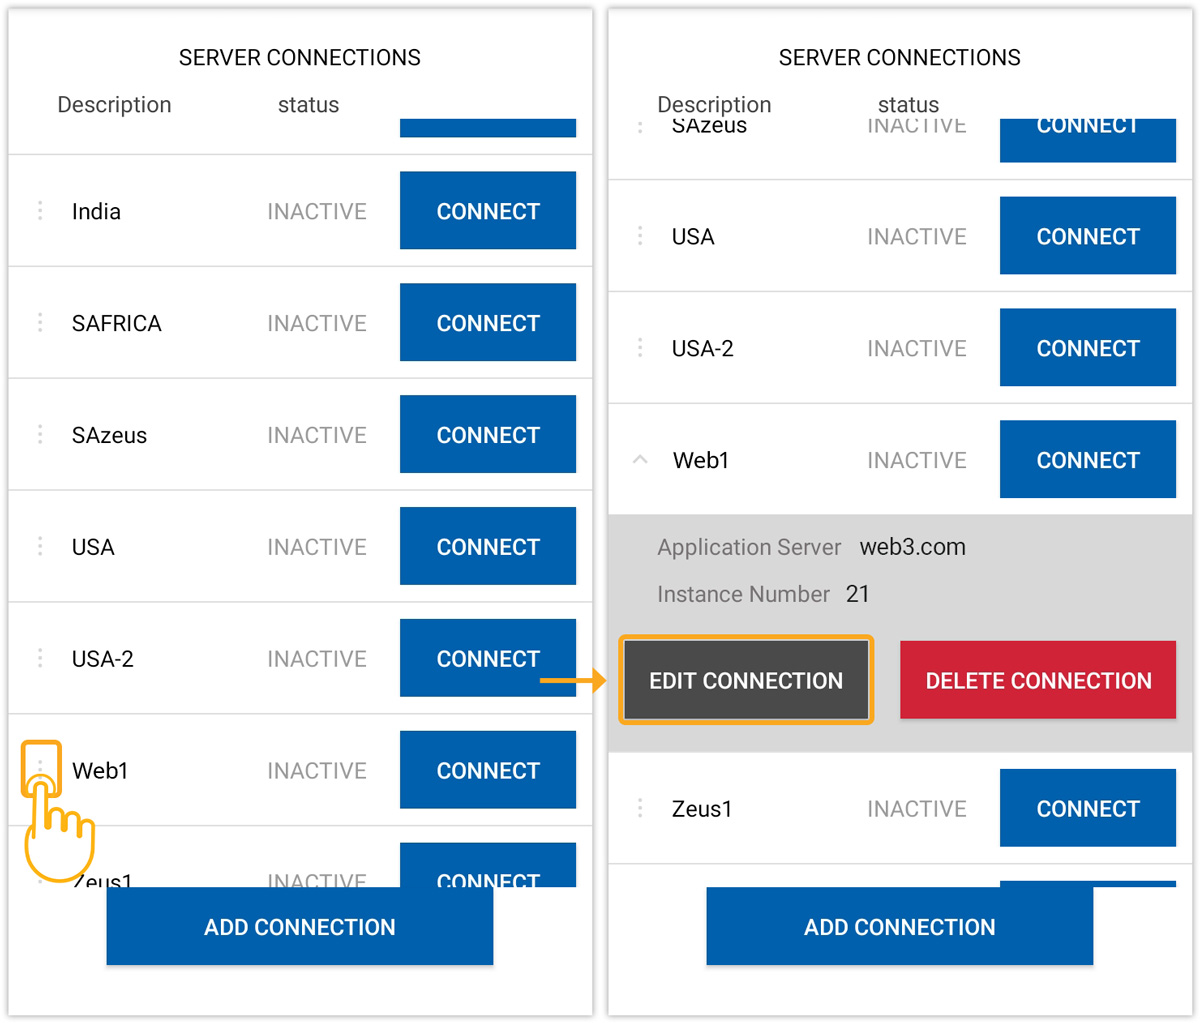
- To view the specifics of the newly established connection, choose Edit from the Server Settings menu in Liquid UI for Android, as shown below.
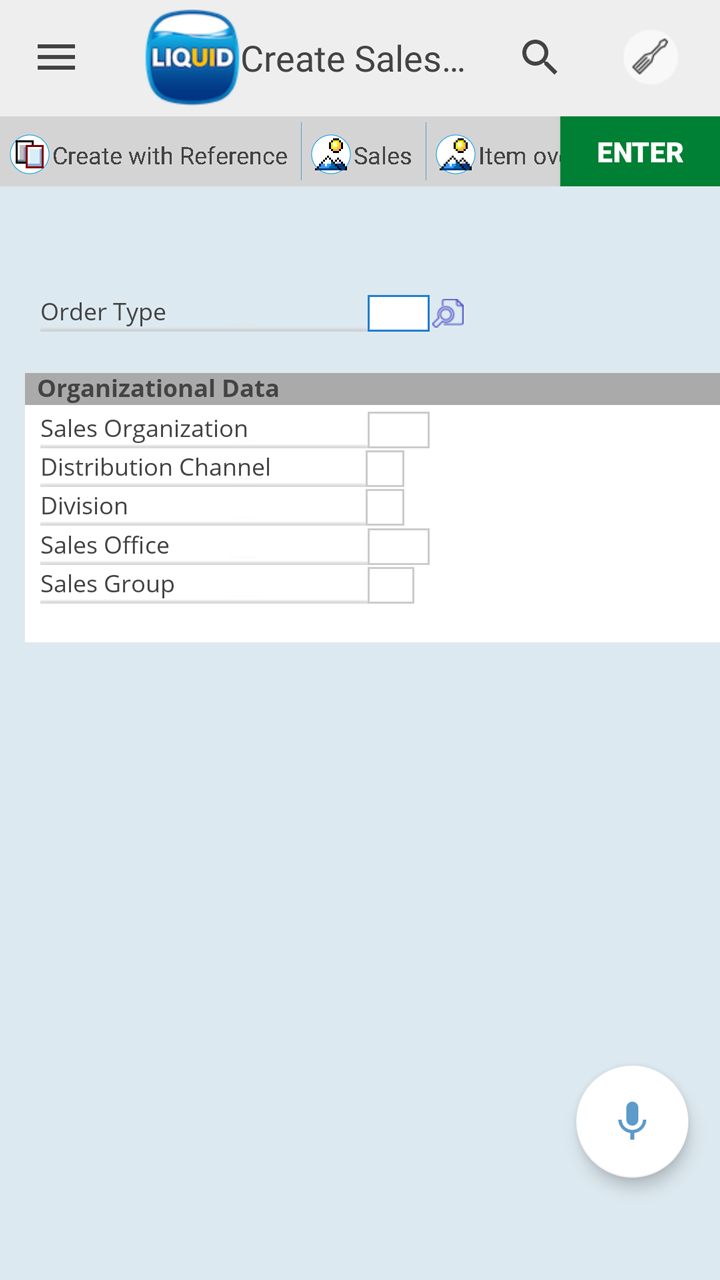
- You will be navigated to the specified start transaction page every time you log in. Enter the required details to proceed.
- On your Liquid UI for Android, select CONNECT for the desired SAP server. You will then be directed to the login page, as displayed below.
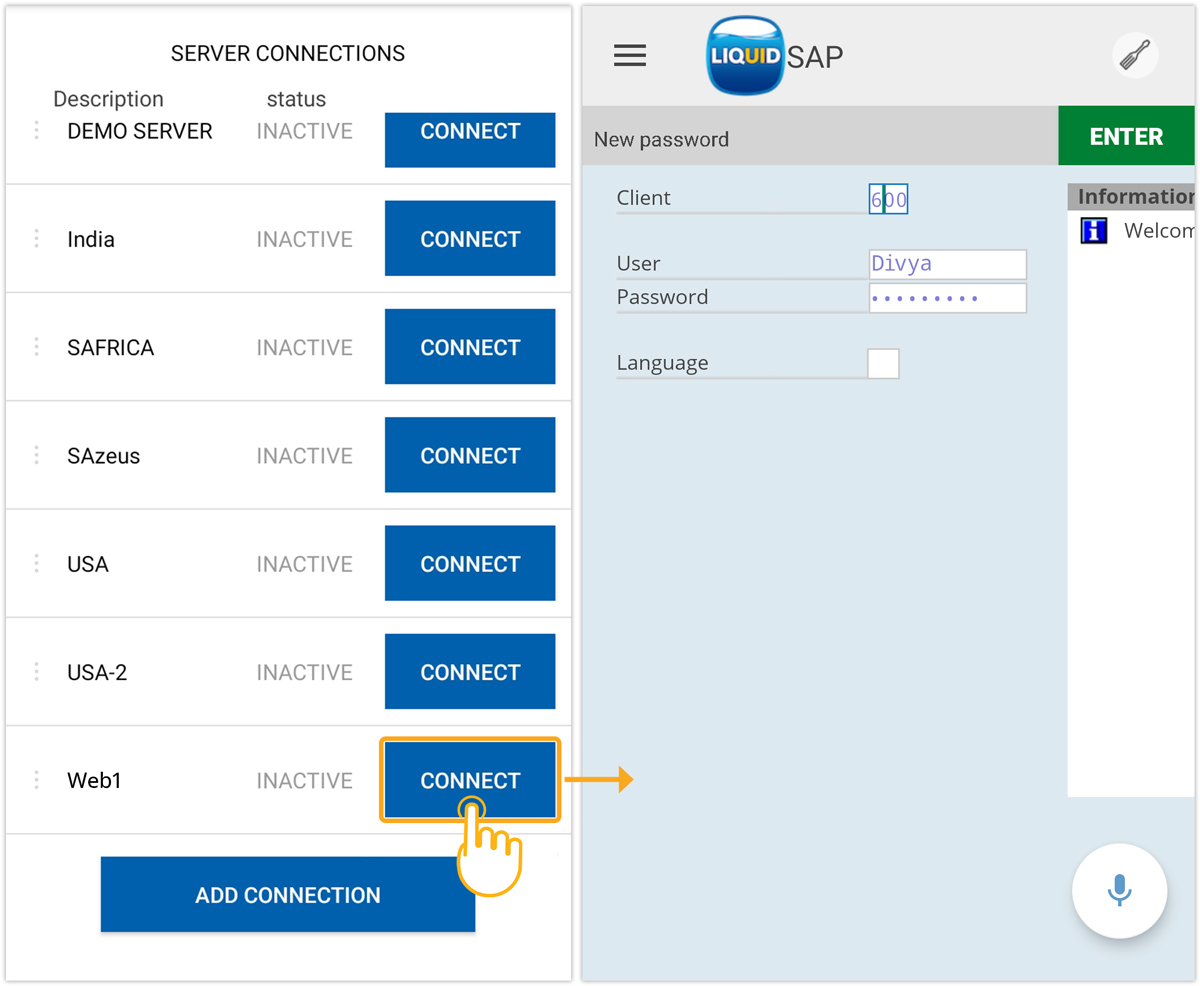
- Every time you log in, you will be navigated to the specified start transaction screen, as shown in the following image. Enter the required details to proceed with the execution.