In most cases, SAP users need to enter a lot of data in tables to execute the transaction processes. Understanding the user's difficulty to enter values in the table cells by scrolling rows and columns, the Liquid UI now provides UI Assistance on tables.
This UI Assist popup window includes all the table columns in the form of Input Fields, allowing the users to enter the values easily and update them in the table. Furthermore, you can quickly navigate between the table rows and edit the required values of any column.
Prerequisites
- Make sure to enable the UI Assist option under Liquid UI App Settings to view UI Assist popup windows for tables in the App.
Enabling UI Assistance
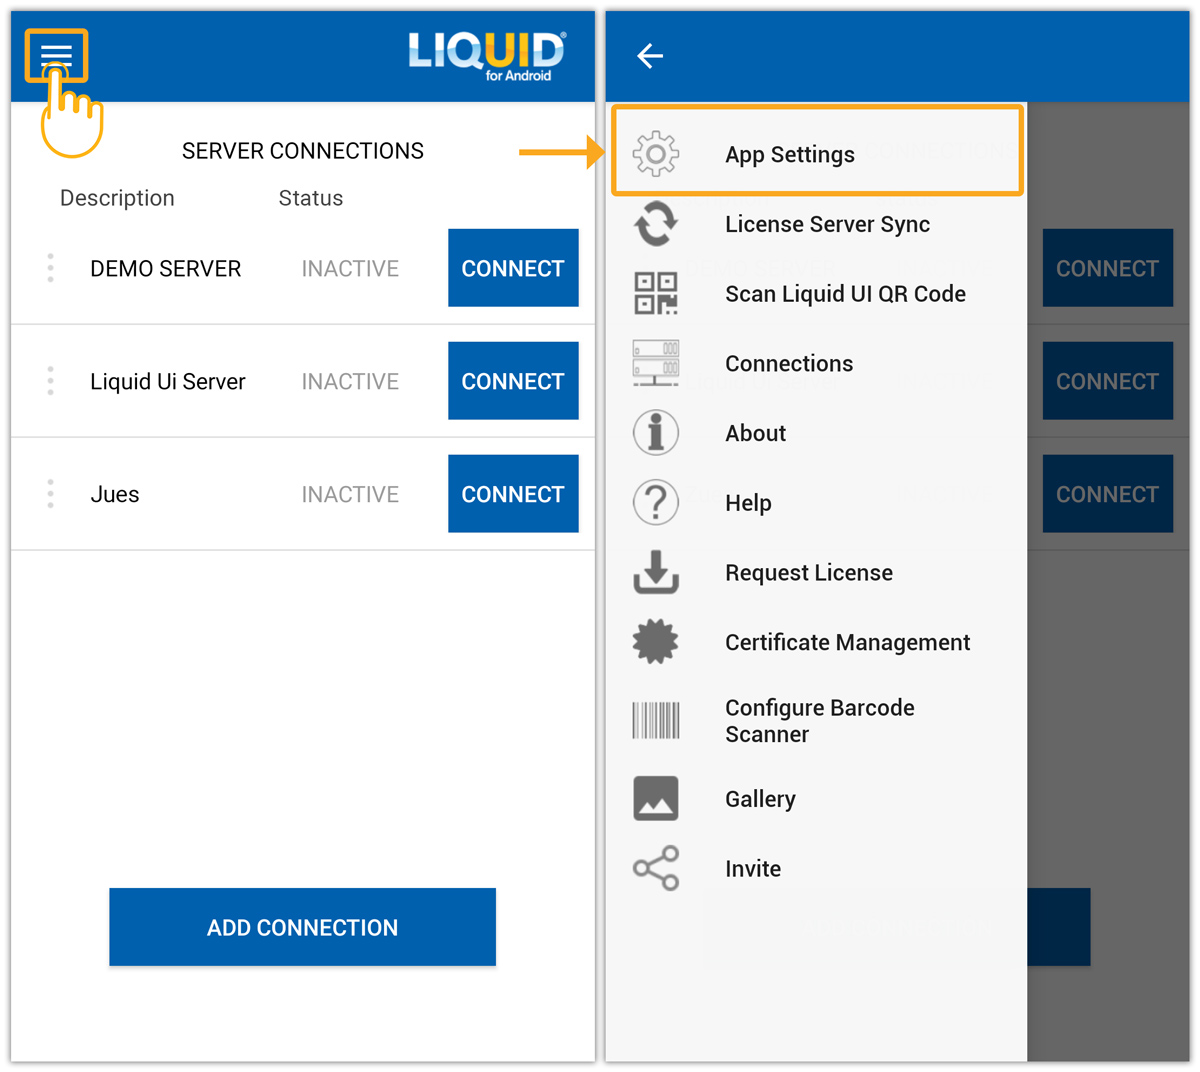
- Navigate through the App Settings under the Main Menu, as shown below.
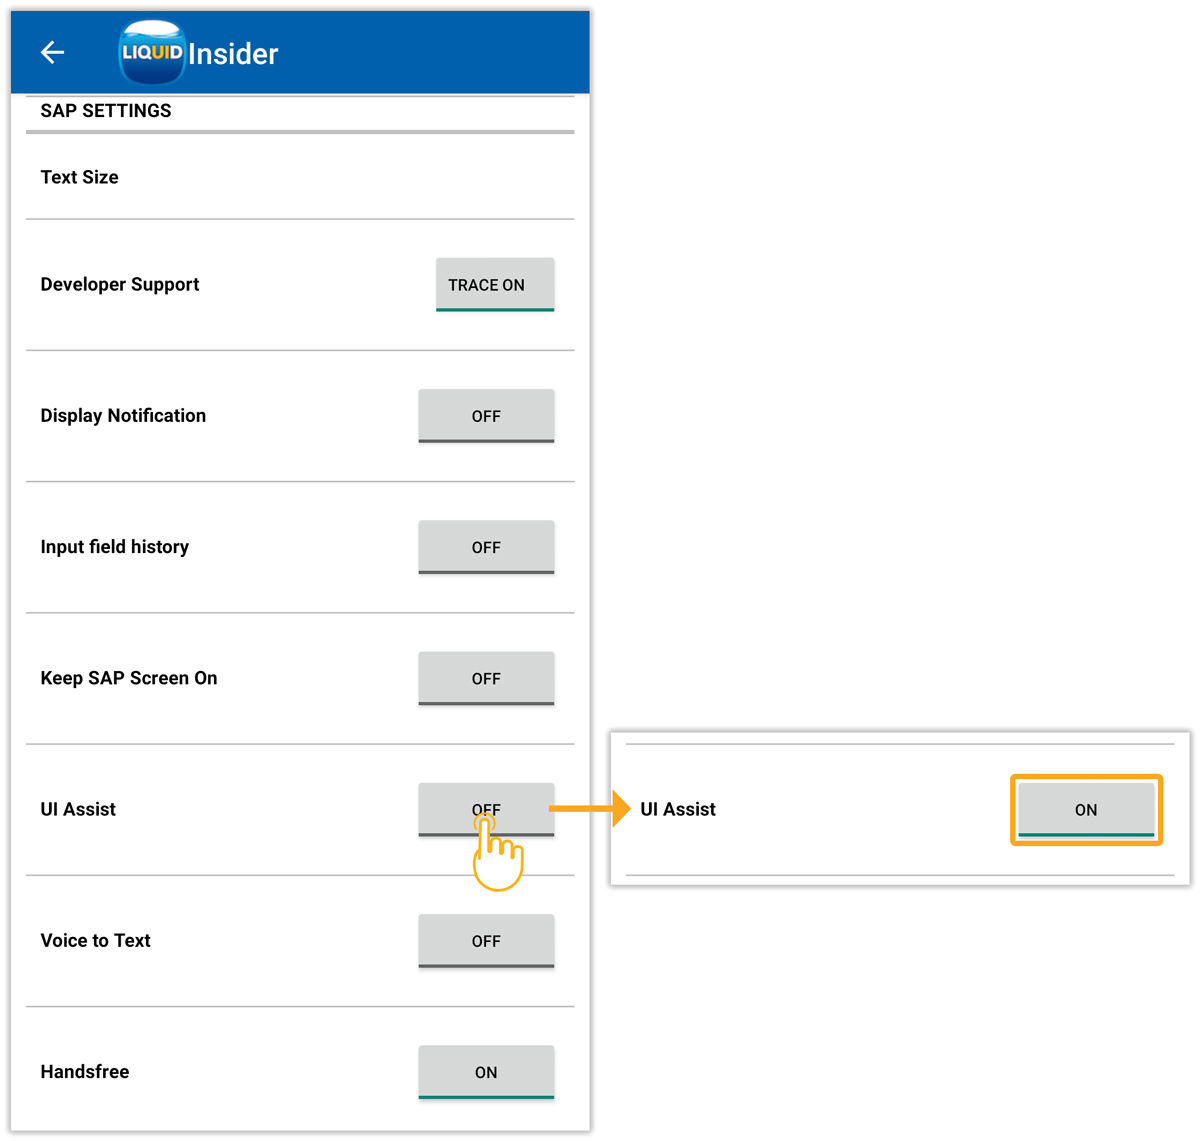
- Scroll down the App Settings screen (Insider) to select and turn on the UI Assist option, as shown below:
In this scenario, we will show you how to add values to the All items table using the UI Assist popup window under the Create Sales Order: Overview screen while creating a sales order.
User Interface
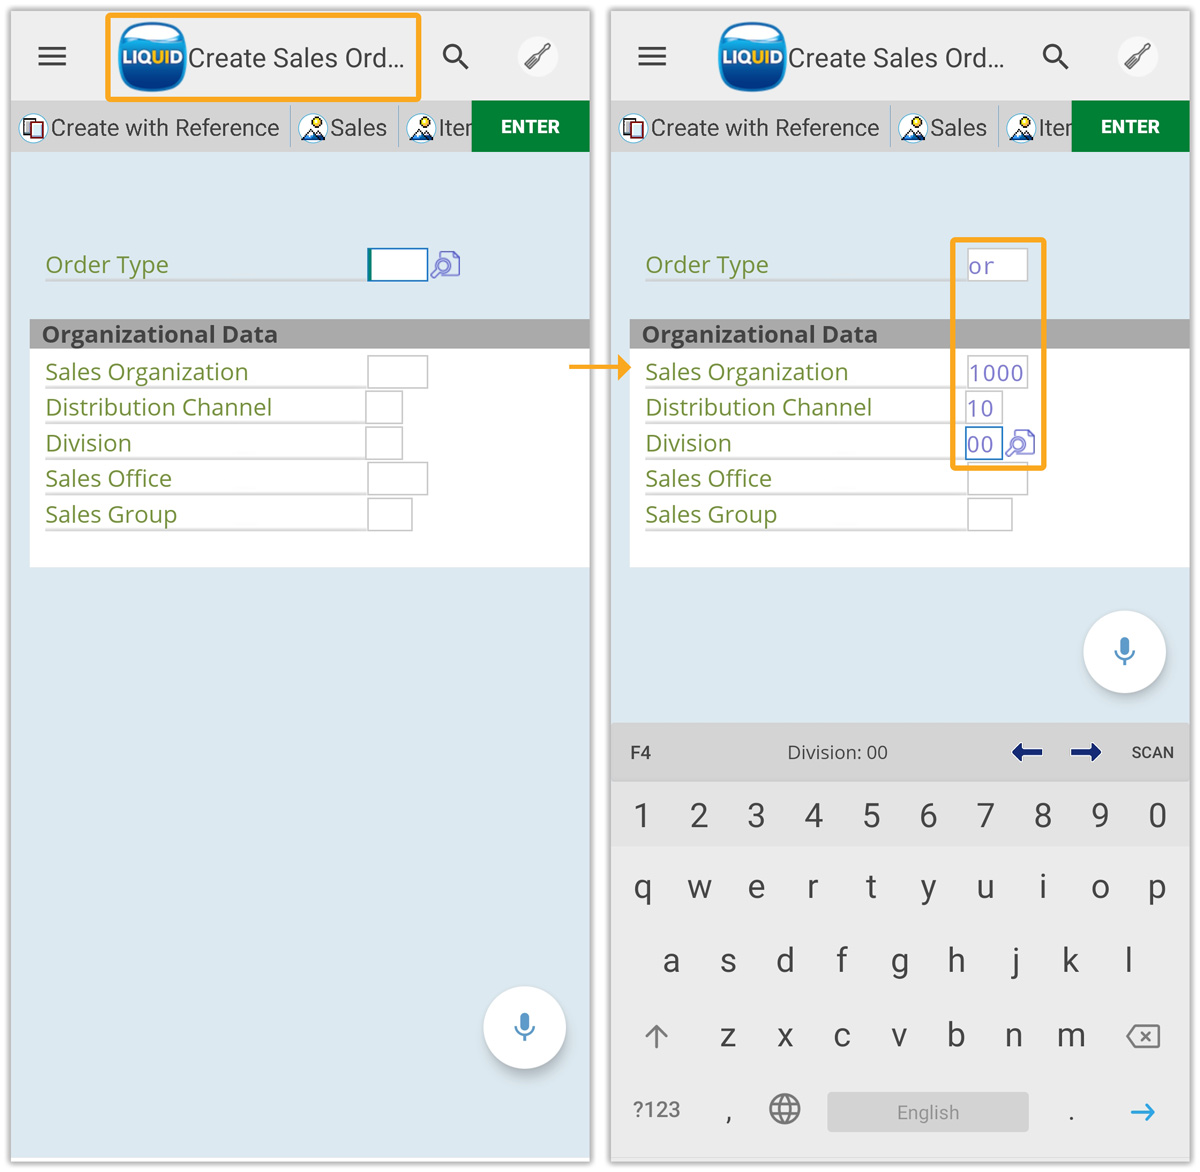
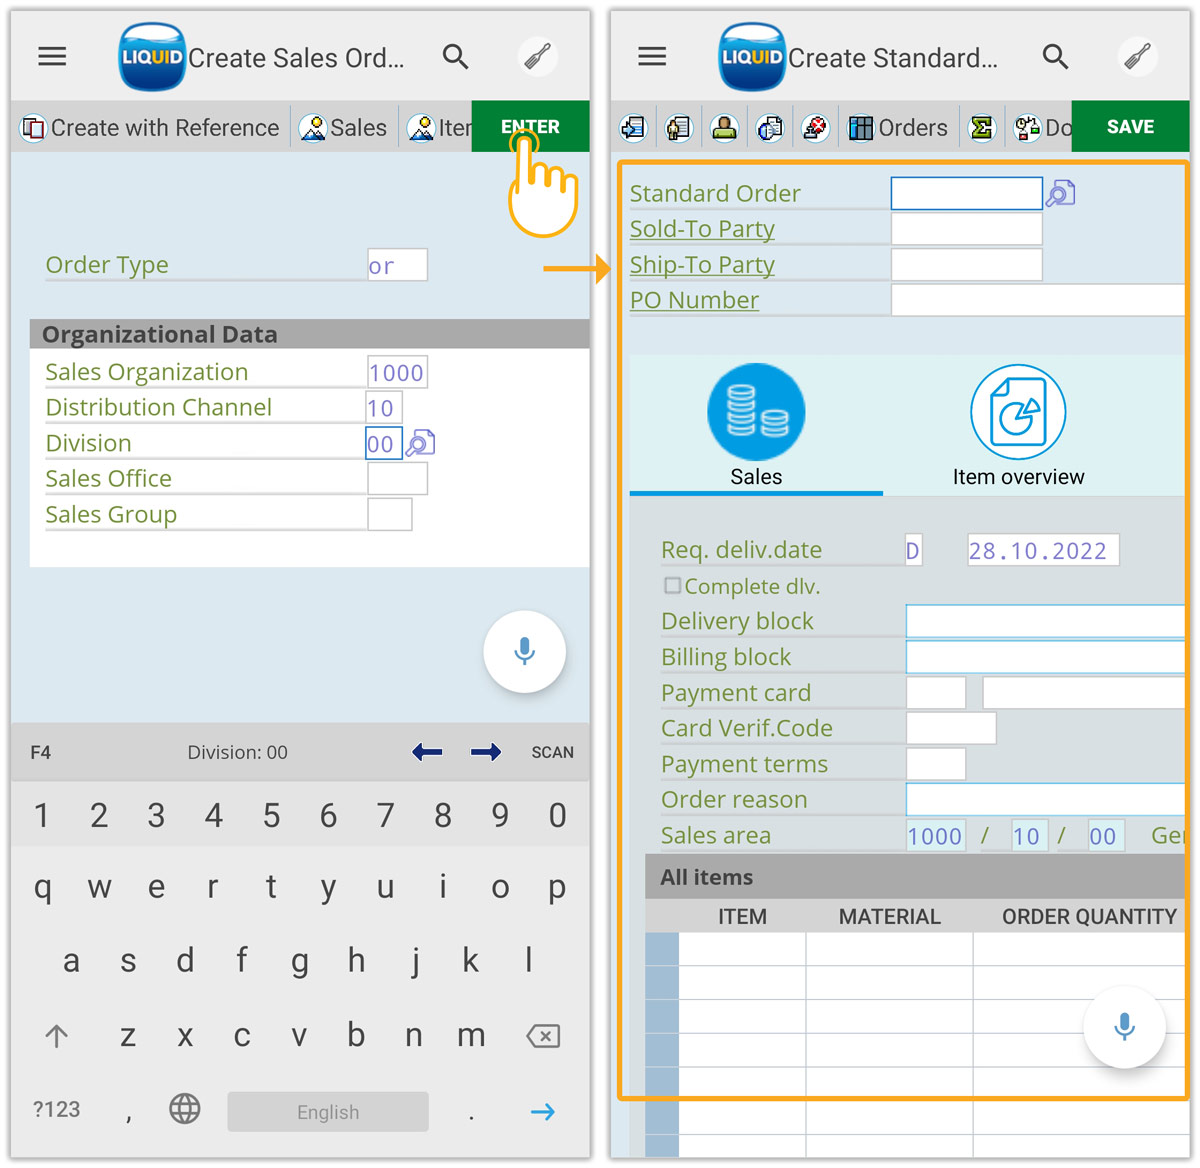
- After connecting to your SAP Server in the Liquid UI App, navigate to the Create Sales Order: Initial screen, and enter the following data in the Input Fields, as shown below:
- Click enter to navigate to the Create Sales Order: Overview screen, and enter the values for the required fields, as shown below:
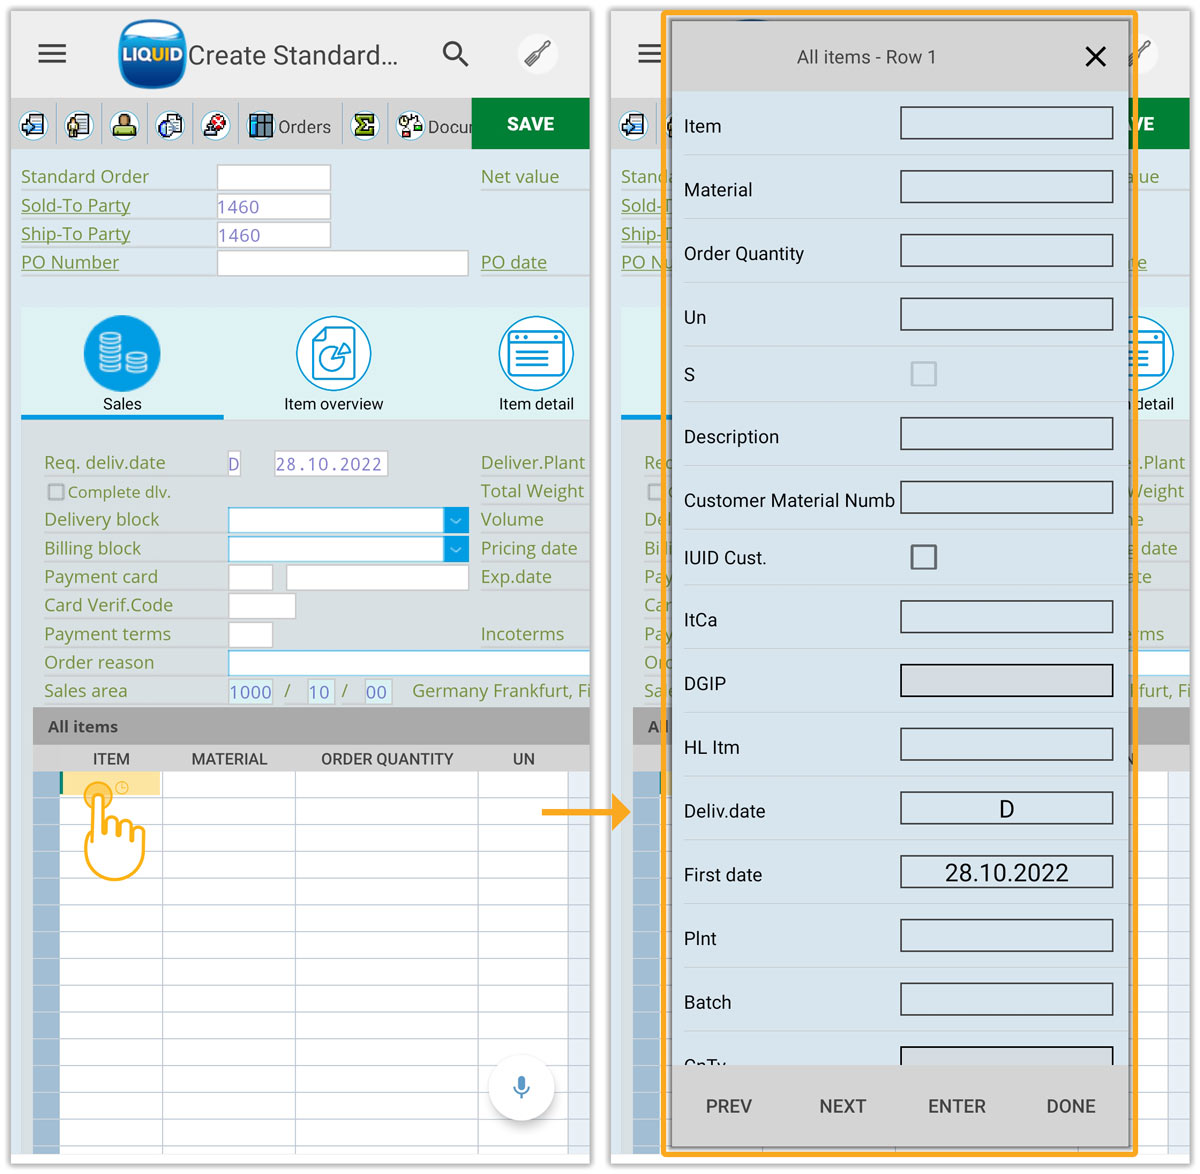
- Here, long-press on any table cell to open a UI Assist popup window, and you will see all the table columns of a row on it in the form of Input Fields to enter values. On the other hand, you can enter values in the table directly or use the voice-to-text feature.
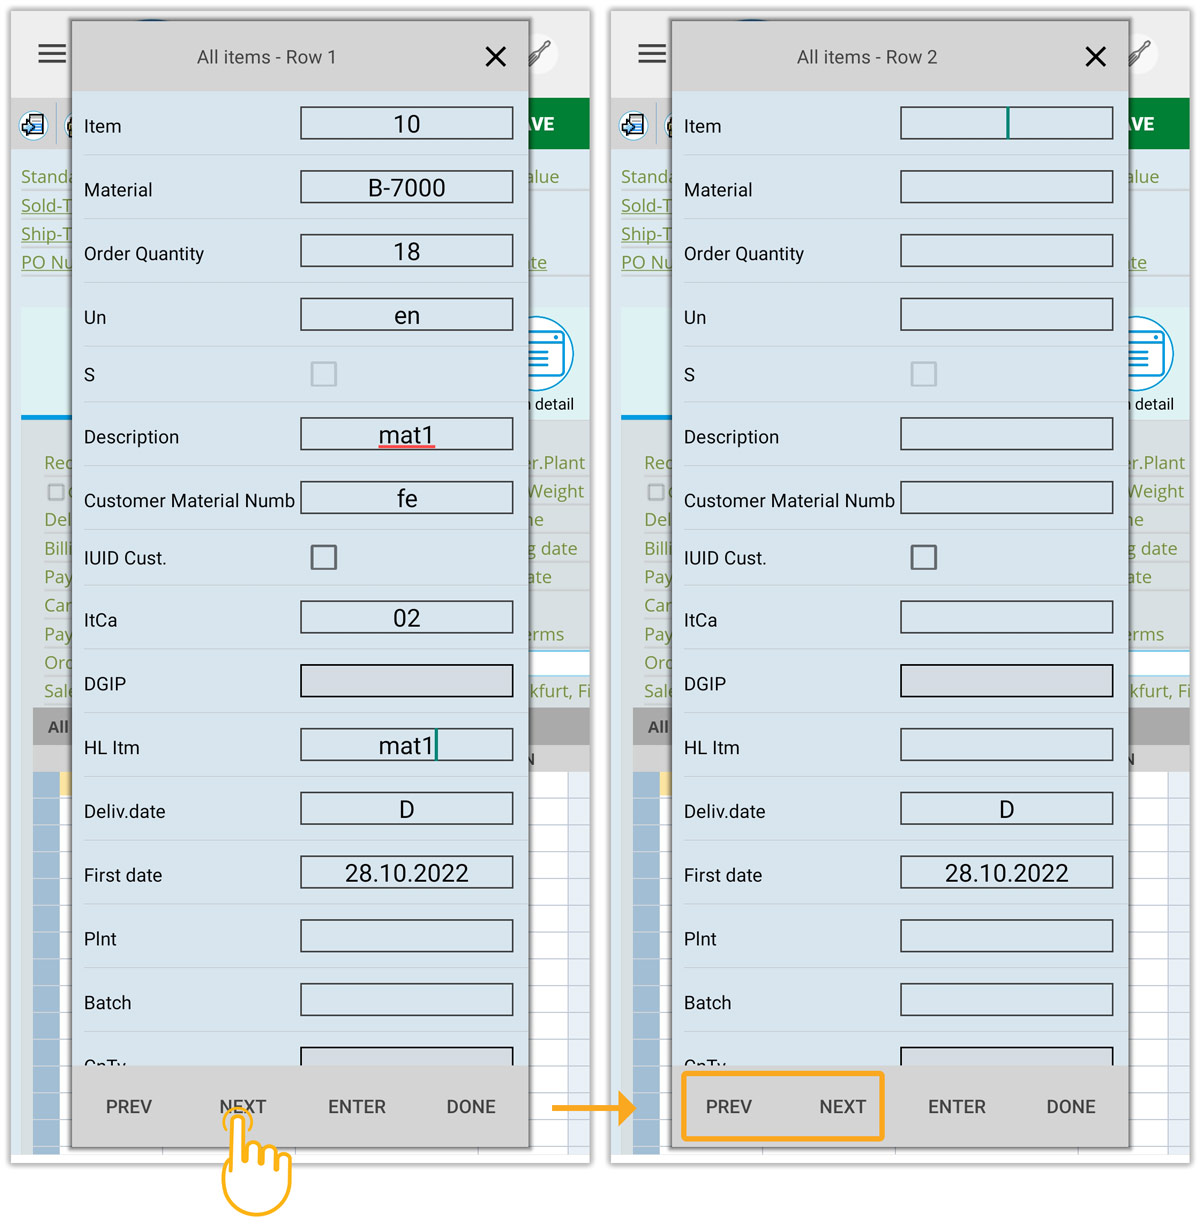
- Then, just tap on the fields and enter the required values, as shown below.

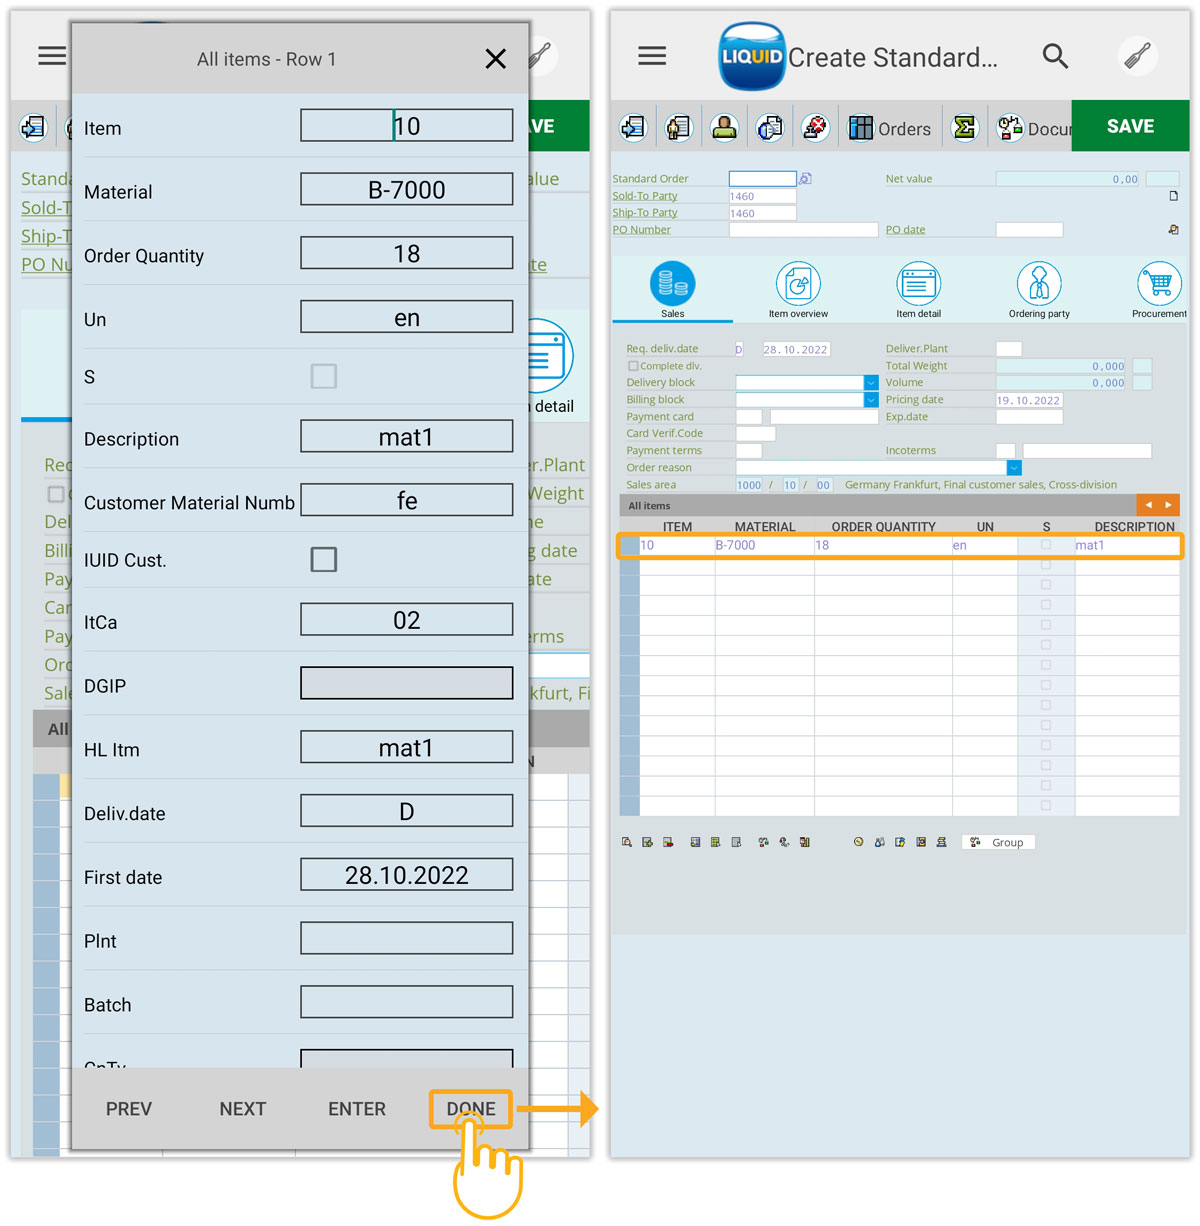
- Click Done to save the column values entered for a table row and they will get updated in the table, as shown below:

Note: The UI Assistance is also available for Liquid UI tables.
- Click the PREV and NEXT buttons to navigate between the rows and add row data, as shown below:
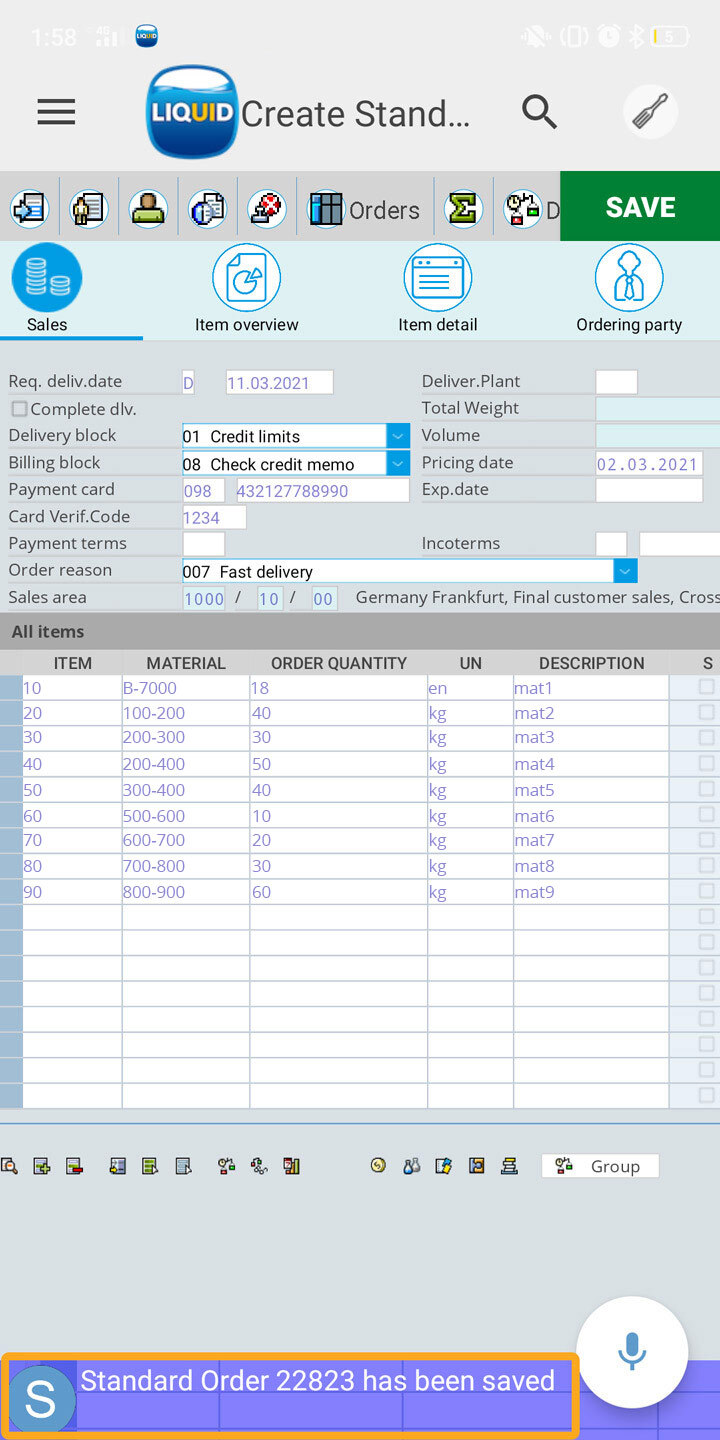
- After entering values in the required fields and table on the Overview screen, click the Save button. Then, click the Continue button on the Open quotations for item screen, as shown below:
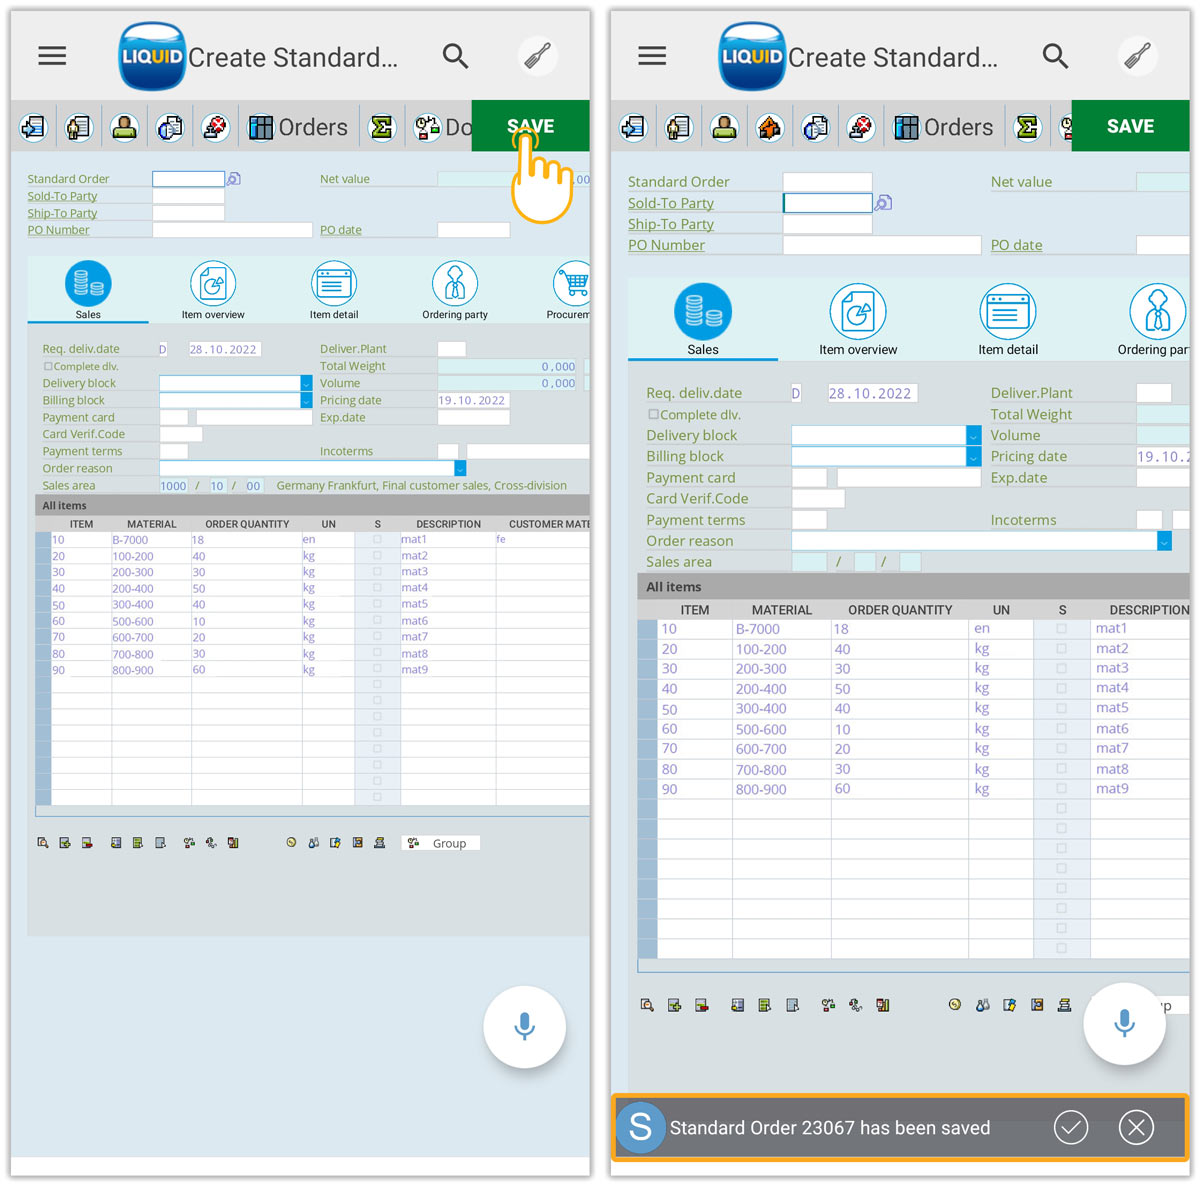
- Then, you will see a success message showing “Standard Order 22823 has been saved”, as shown below.