Liquid UI for Android is now optimized to support the voice assistant, which performs actions through voice commands while freeing hands and driving efficiency. The Voice to Text feature allows users to execute SAP transactions, including data entries or executing commands, run reports, and post transactions, resulting in faster execution of tasks.
Liquid UI's voice assistant will listen for key commands in speech, detect them, and accordingly execute operations. Adding to this, the voice assistant fetches data from the SAP backend systems for further processing.
With Liquid UI Voice Assistant, you can perform:
- Navigation between transactions (e.g., Go to transaction VA01).
- Assigning values to the input fields (e.g., Set order type to OR, Set order type to 100).
- Execute the Push button and Context menu options (e.g., Help, Back, Possible Entries, and more)
- Executing operations such as
- Perform Enter - Executes Enter operation.
- Move to the next field - The cursor moves to the next field.
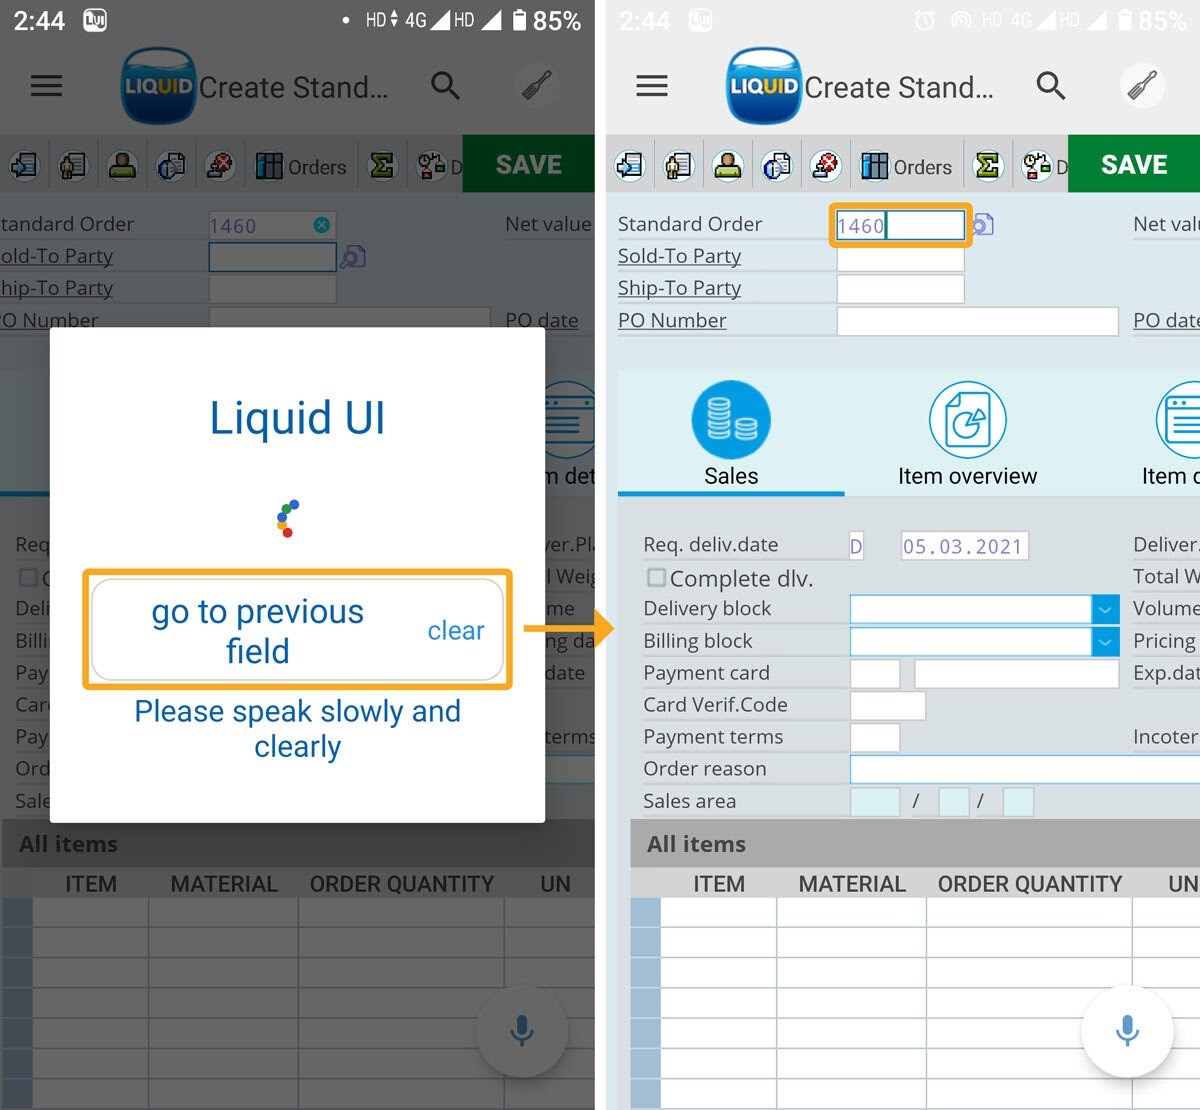
- Move to the previous field - The cursor moves to the previous field.
- Perform Save - Executes Save operation.
- The Voice To Text feature has been enhanced to enable or disable accessibility. To enable it, just turn on the switch associated with it. By default, this option is disabled.
User Interface
In this scenario, you will learn how to use the voice assistant feature in the Liquid UI for Android app.
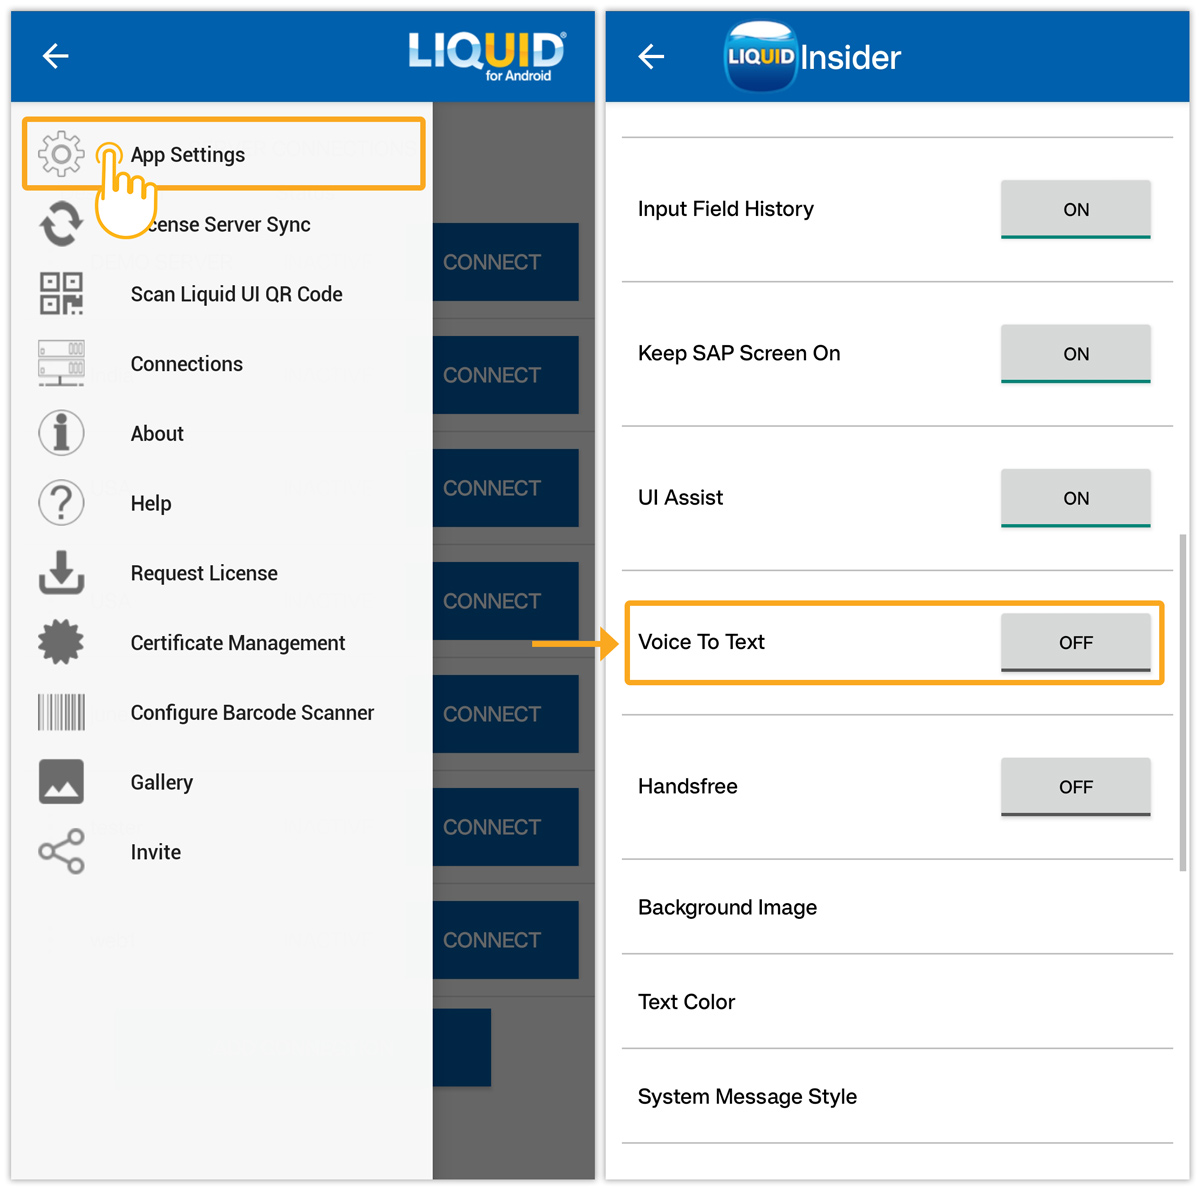
- Open the Liquid UI for Android app, in the Main menu click on App Settings. Scroll down to the Voice To Text option, as shown in the image below.
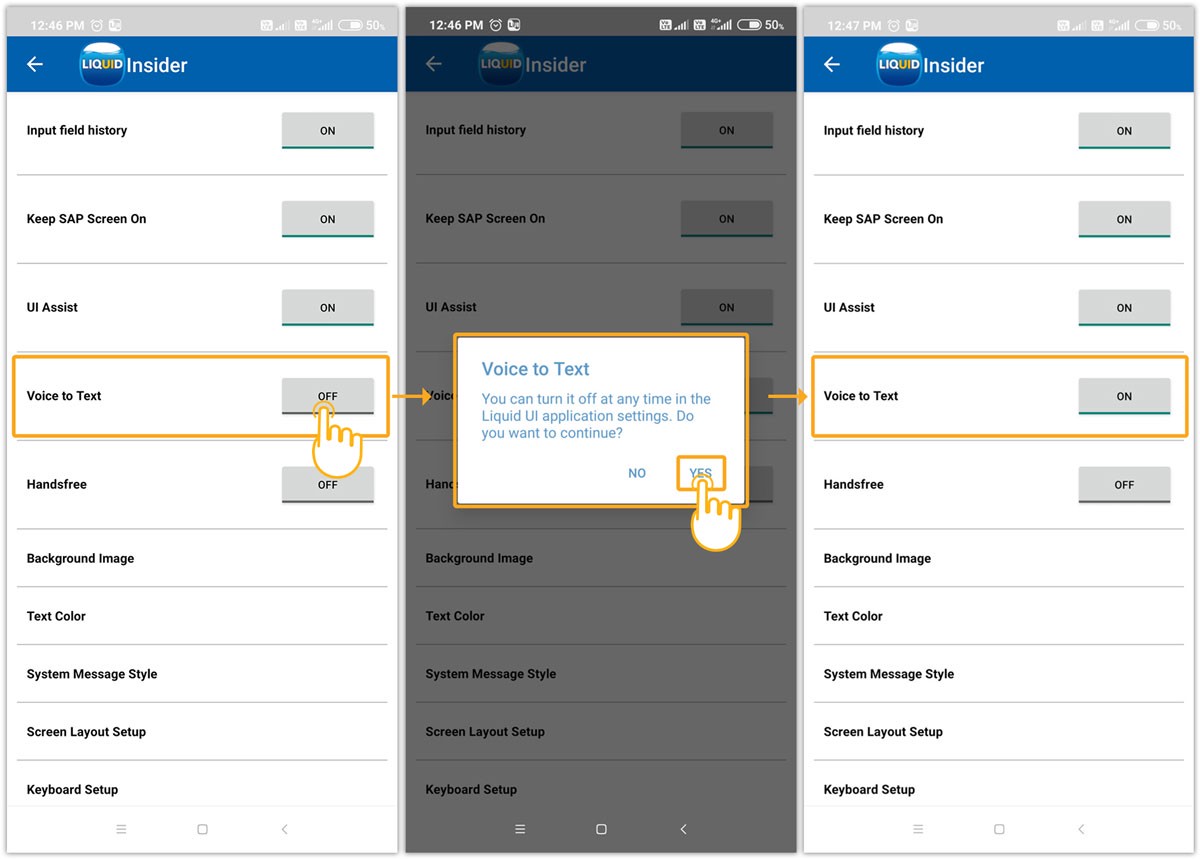
By default, voice assistance is disabled. Please follow the steps outlined below for enabling it.
- Click the switch to enable the feature, then displays a pop-up message with No and Yes options. Click Yes to continue with the voice assistant, as shown below.
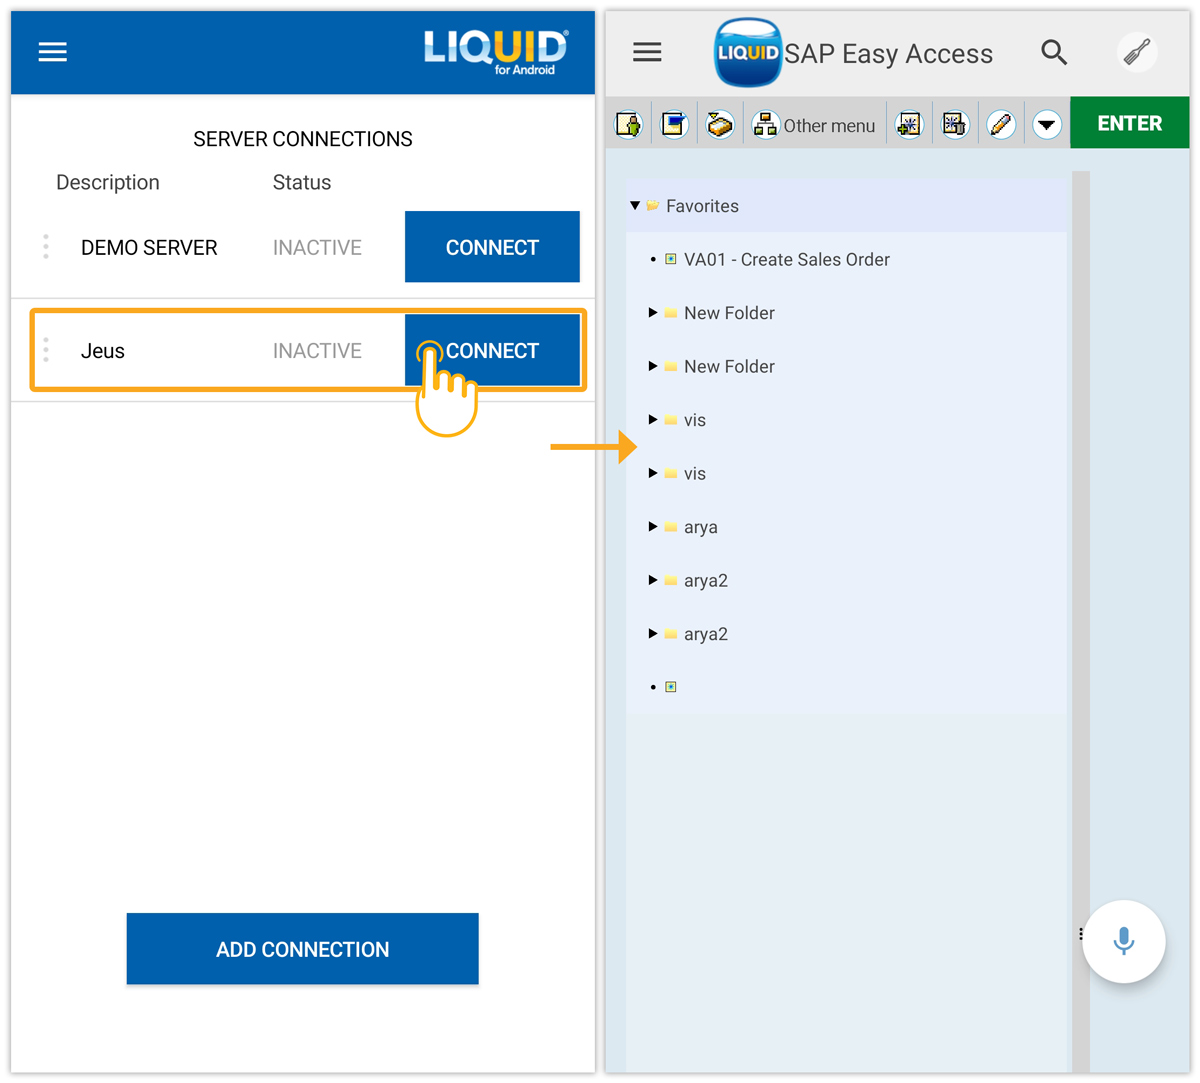
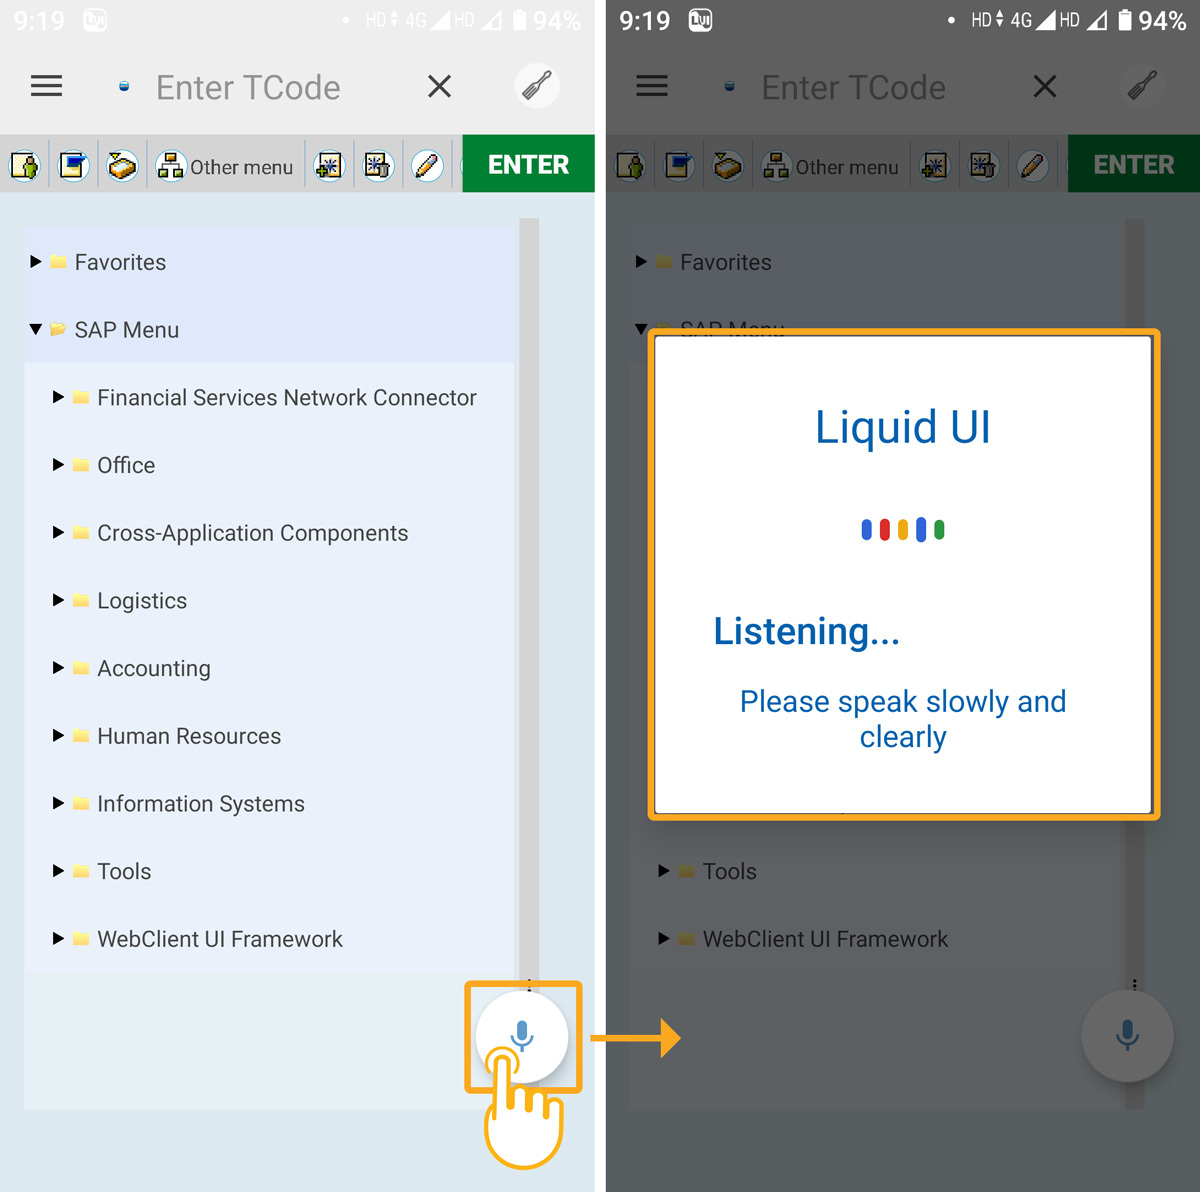
- Connecting to your SAP Server navigates you to the SAP Easy Access screen, as shown below.
- Click on the Mic icon located at the bottom right corner of the SAP screen to enable the voice assistant and start instructing using voice.
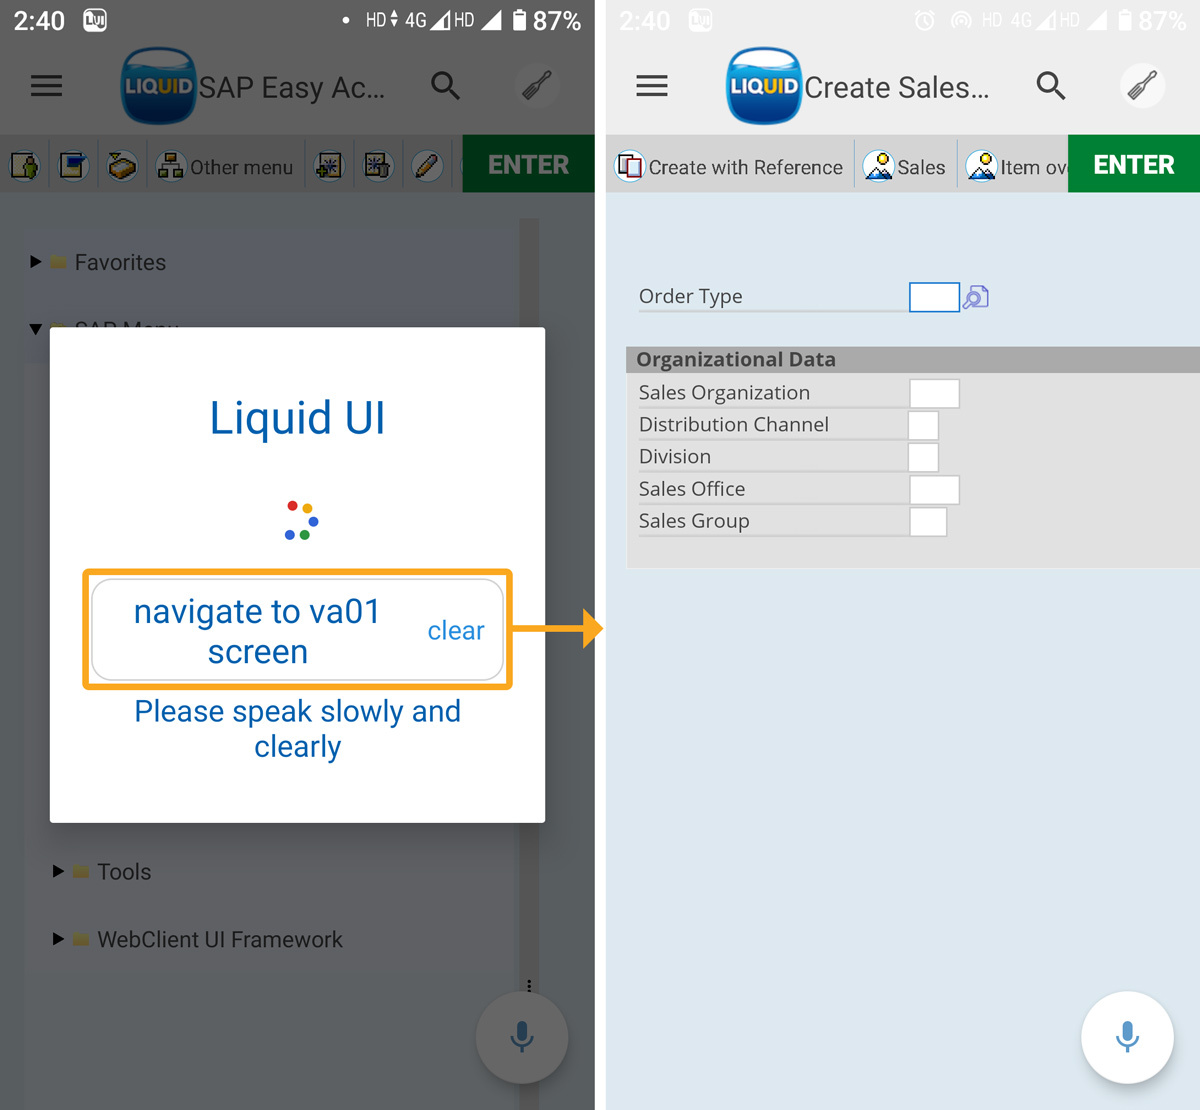
- After enabling the mic, we are instructing the voice assistant to navigate to the VA01 (Create Sales Order Screen) to validate and showcase the Voice To Text feature.
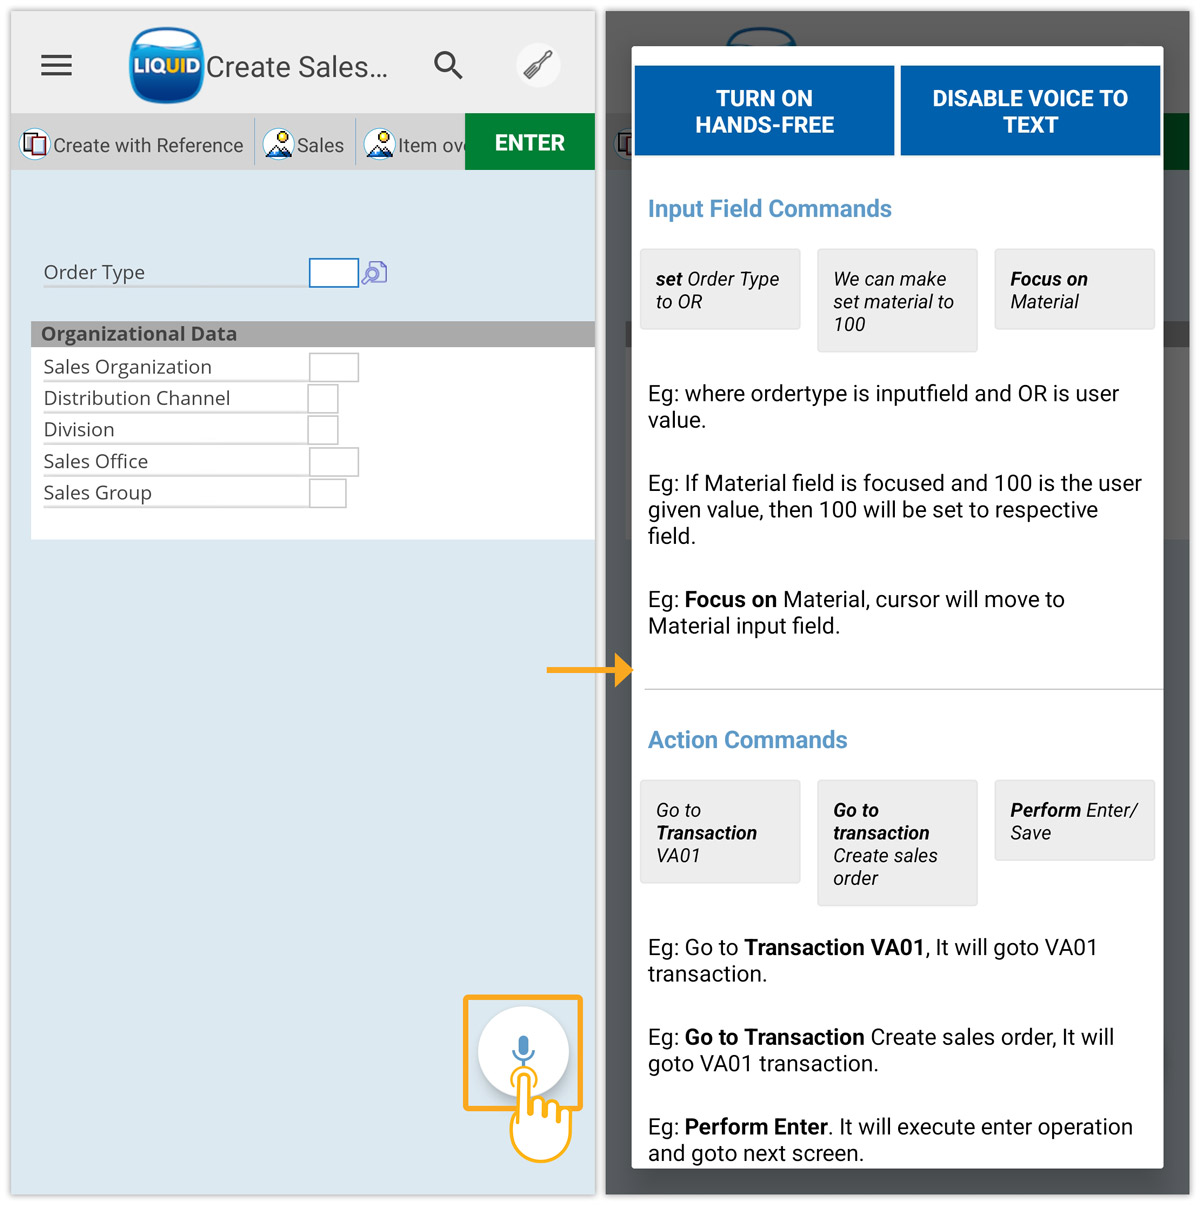
- Long-pressing on the Mic icon will show a list of the available command options to instruct the assistant. These options include Input Field commands, action commands, navigation commands, and a button to disable the Voice to Text option, as shown in the image below.
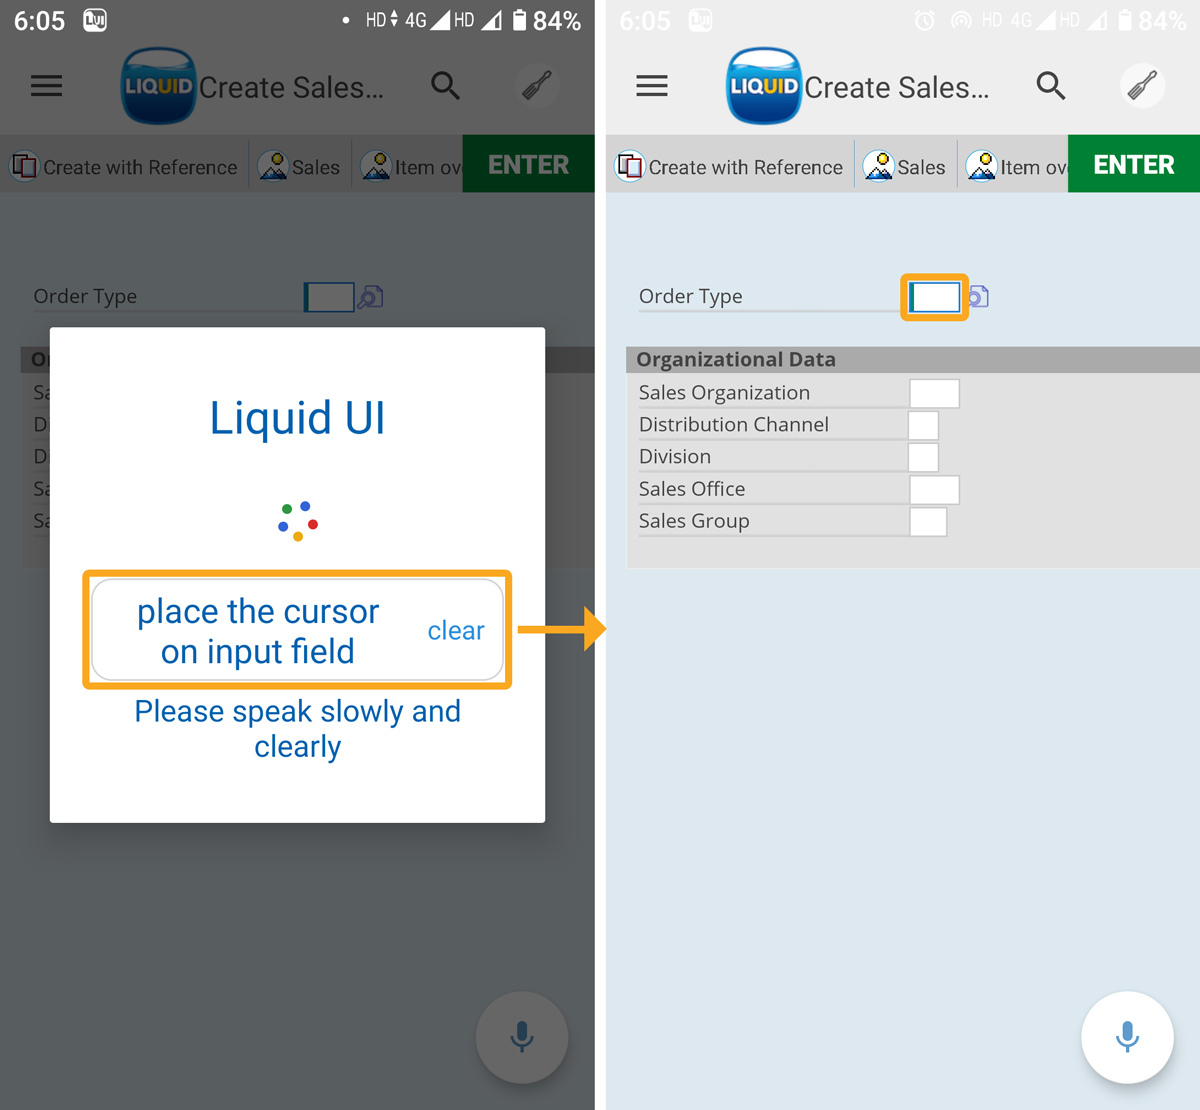
- Here, we are instructing the assistant to place the cursor on the Order Type Input Field.
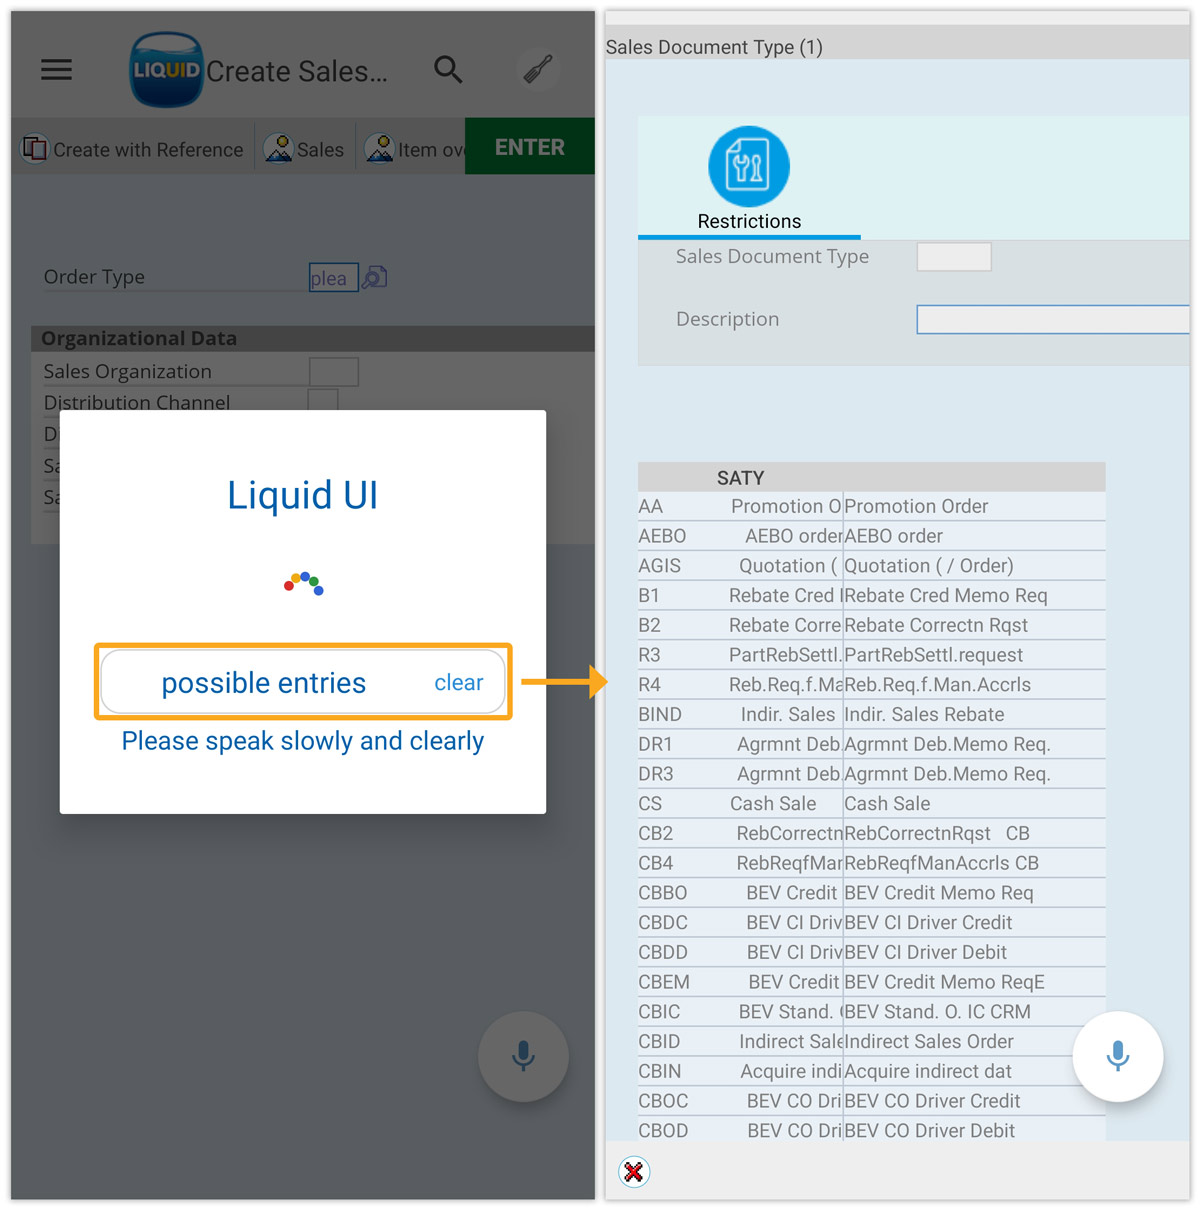
- You can also perform context menu options using the voice assistant. For instance, instruct the assistant with the command “Possible Entries”. This displays the sales document entries, as shown in the image below.
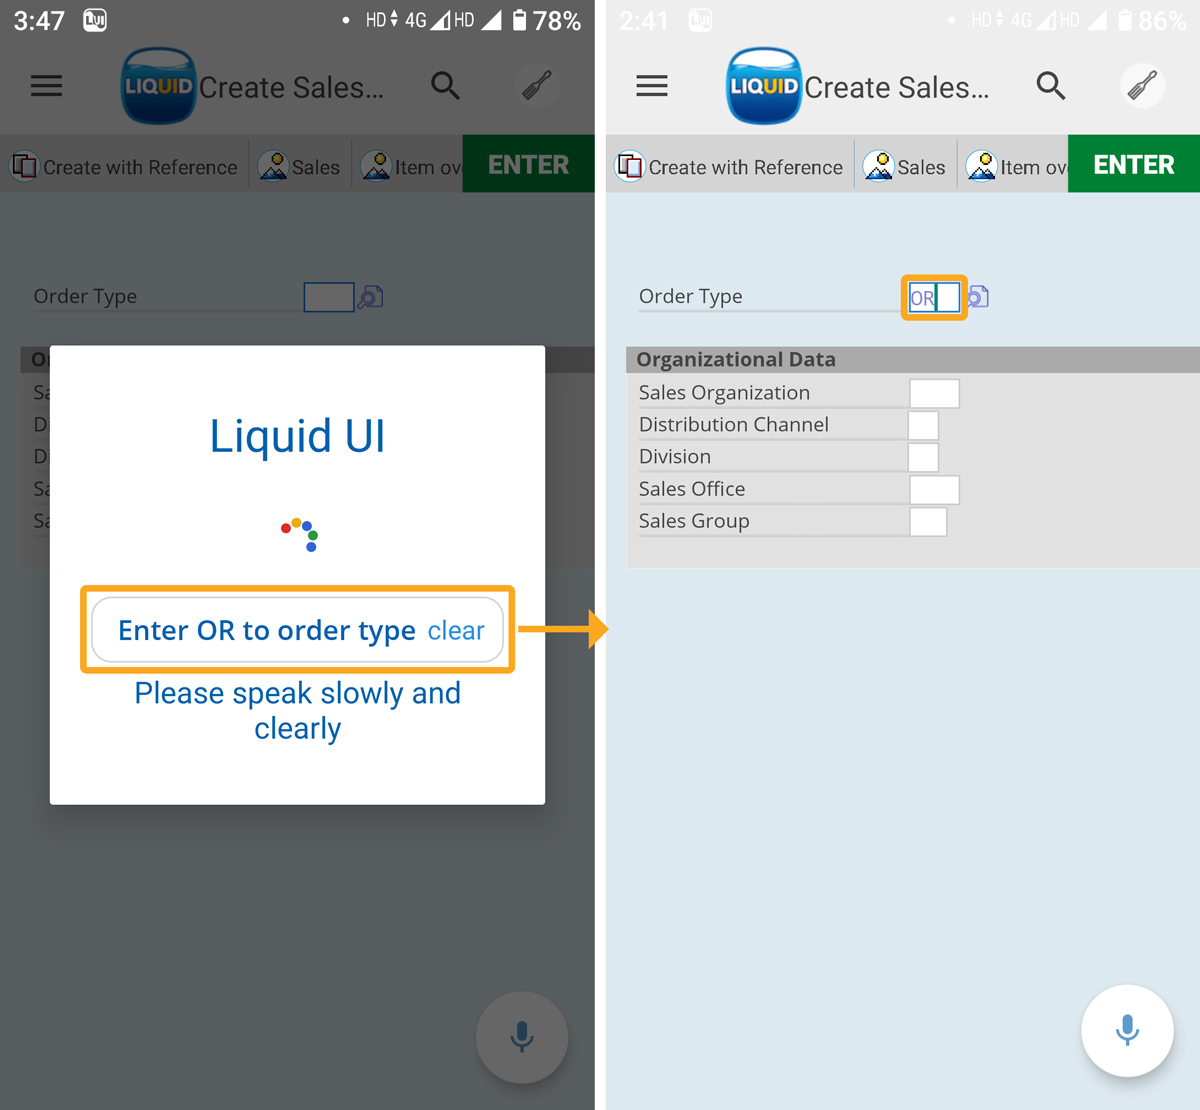
- Now, instruct the assistant to Enter OR in the Order Type Input Field, as shown in the image below.
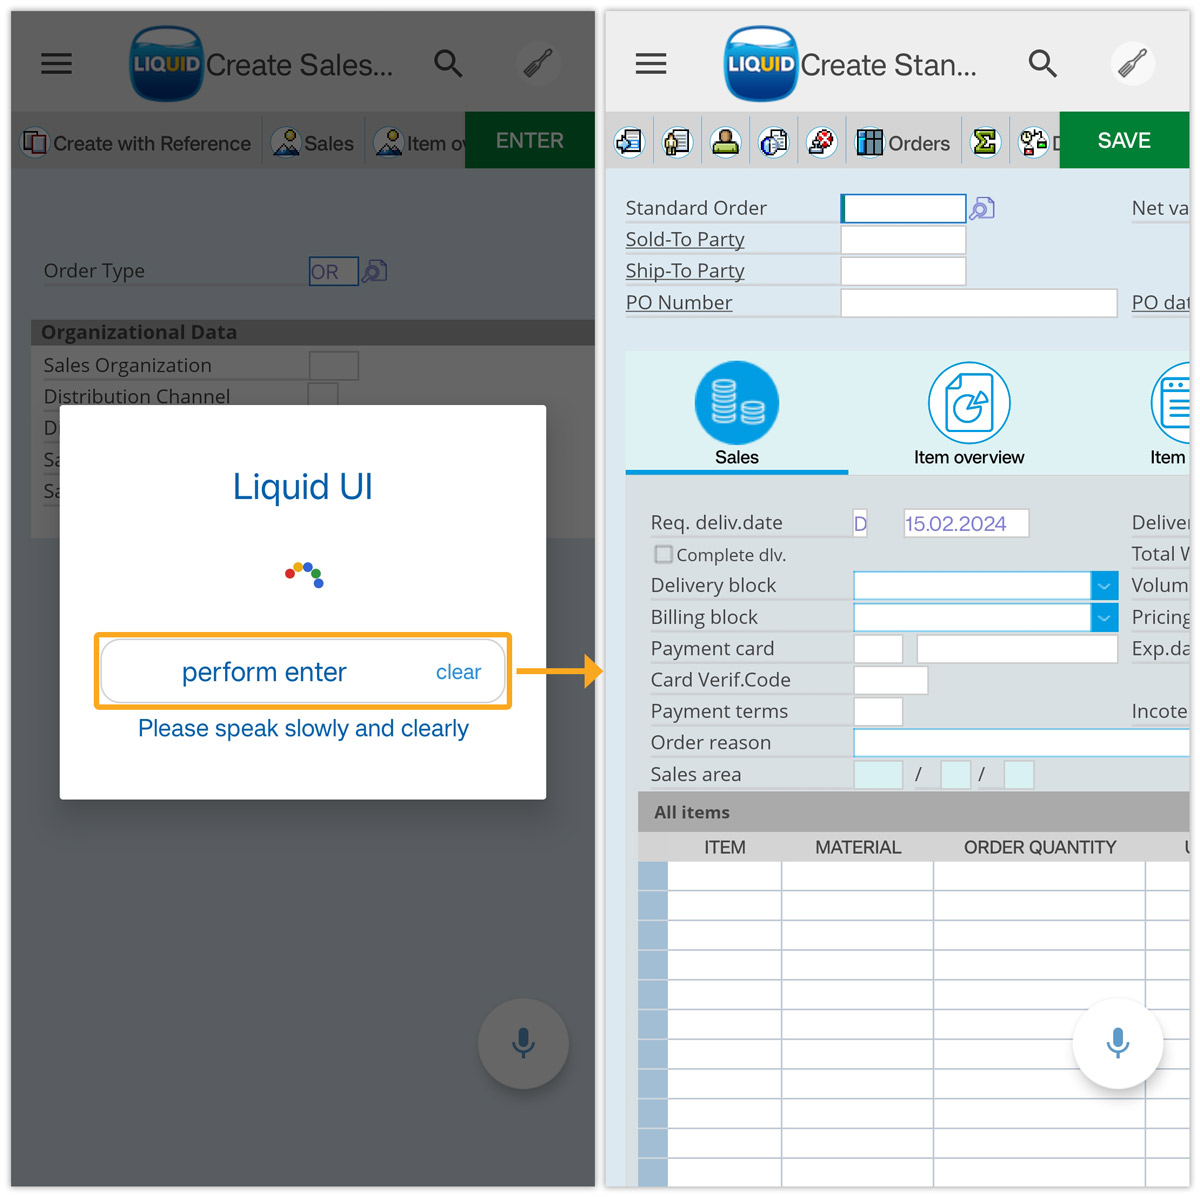
- Instruct the assistant to perform Enter, to navigate to the Create Standard Order: Overview screen.
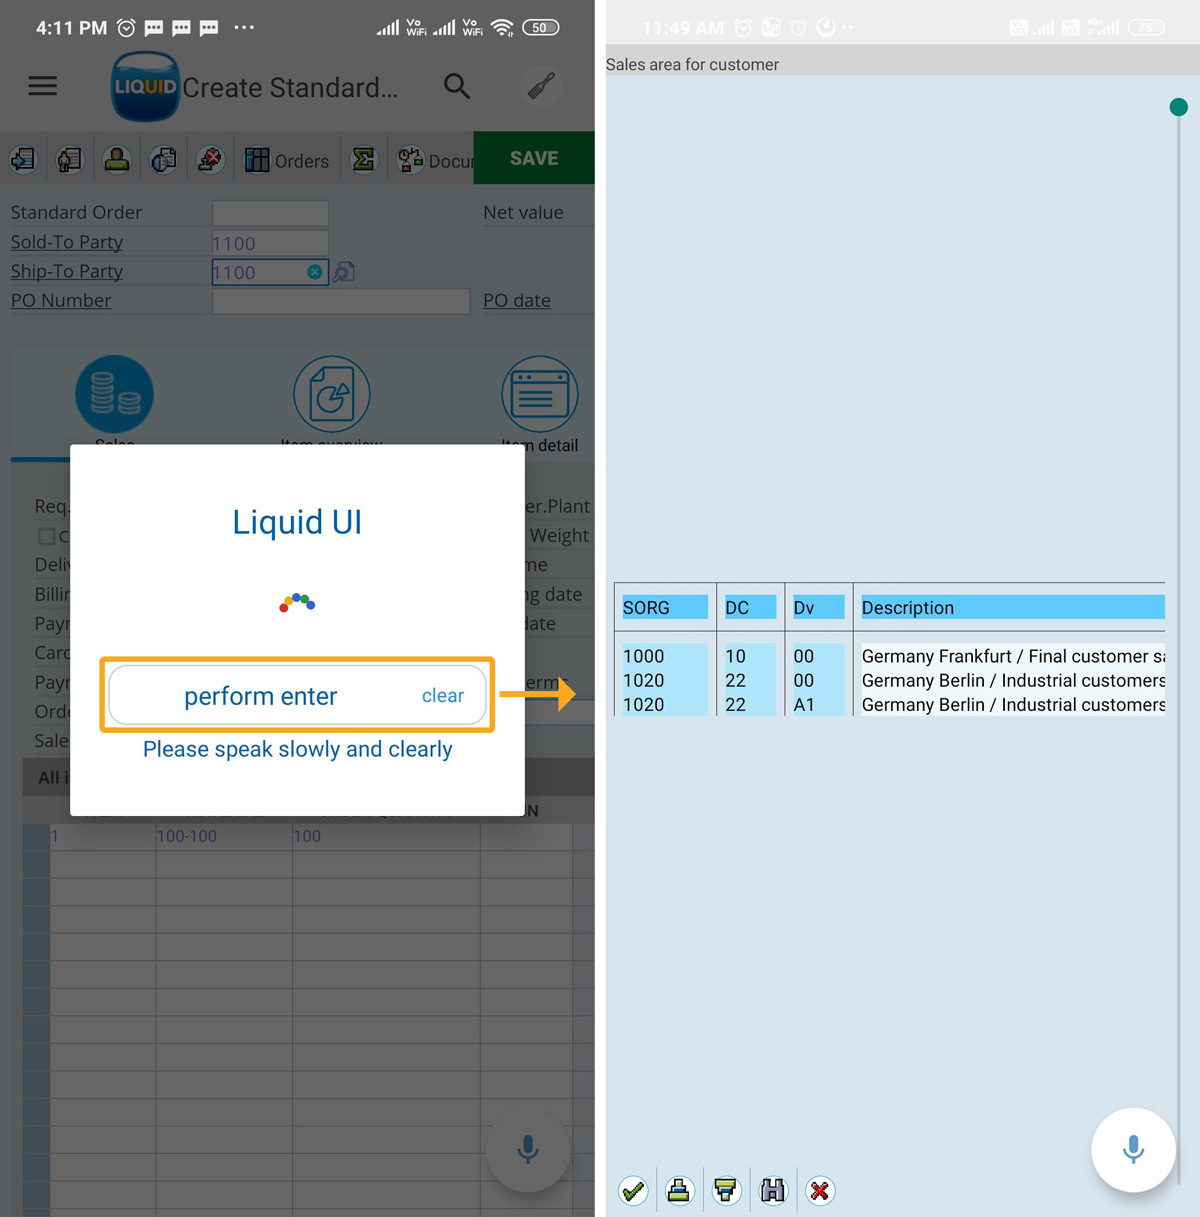
- After assigning the values to the Sold-To Party, and Ship-To party Input Fields, instruct the assistant with the command Perform Enter. This action will add values to the Input Fields and navigate you to the Sales area for customer screen, as shown in the image below.
- Here, we are assigning the value 1460 to the Standard Order Input Field.

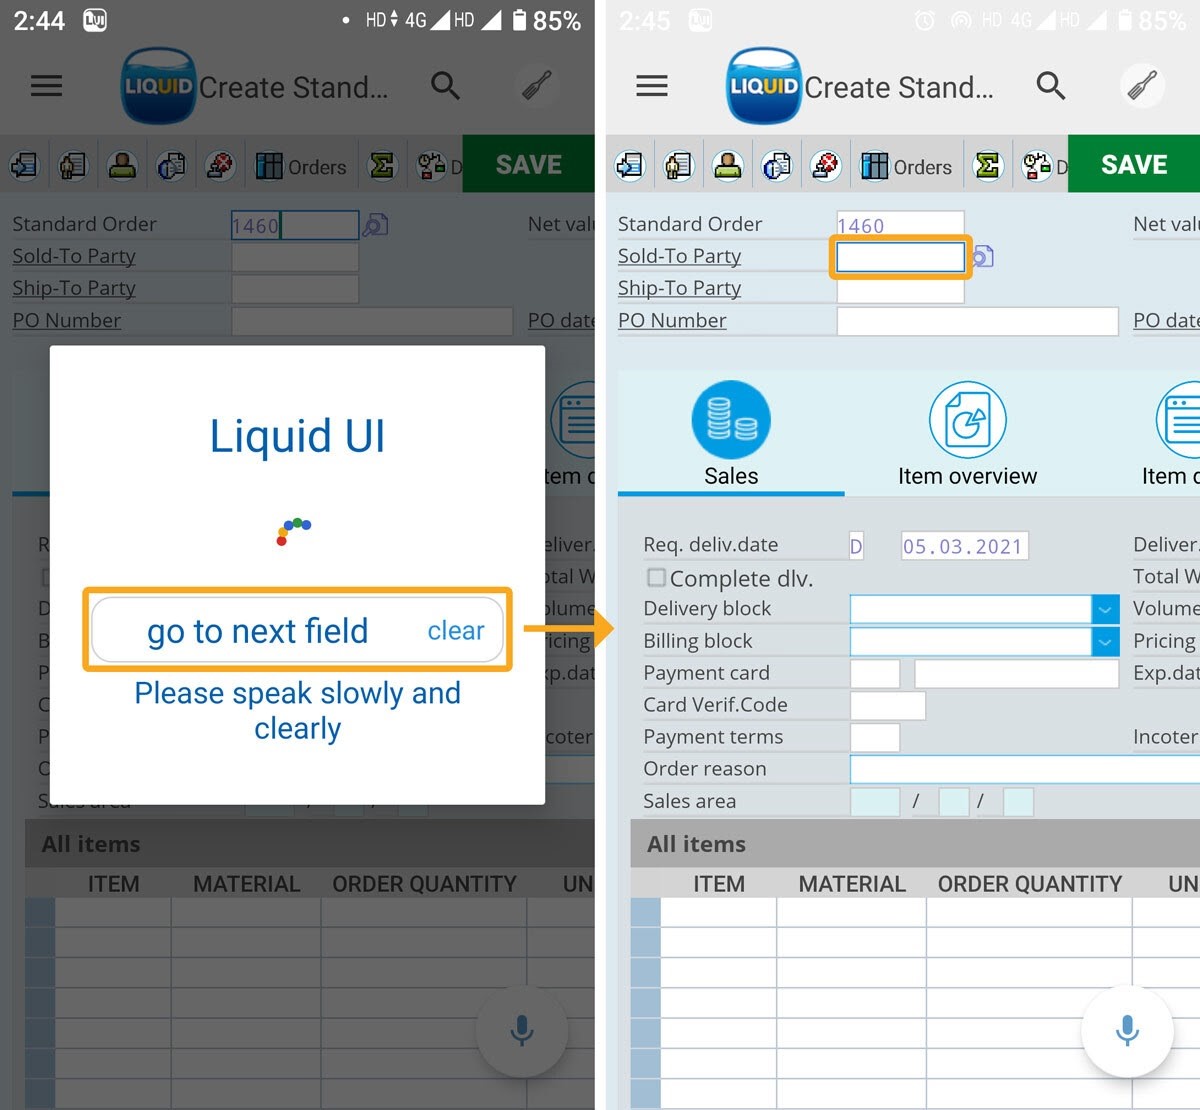
- Now, instruct the assistant to move the cursor to the Next field, as shown in the following image.
- Now, instruct the assistant with the command "go to previous field" to move the cursor to the Previous field, as shown in the image below.